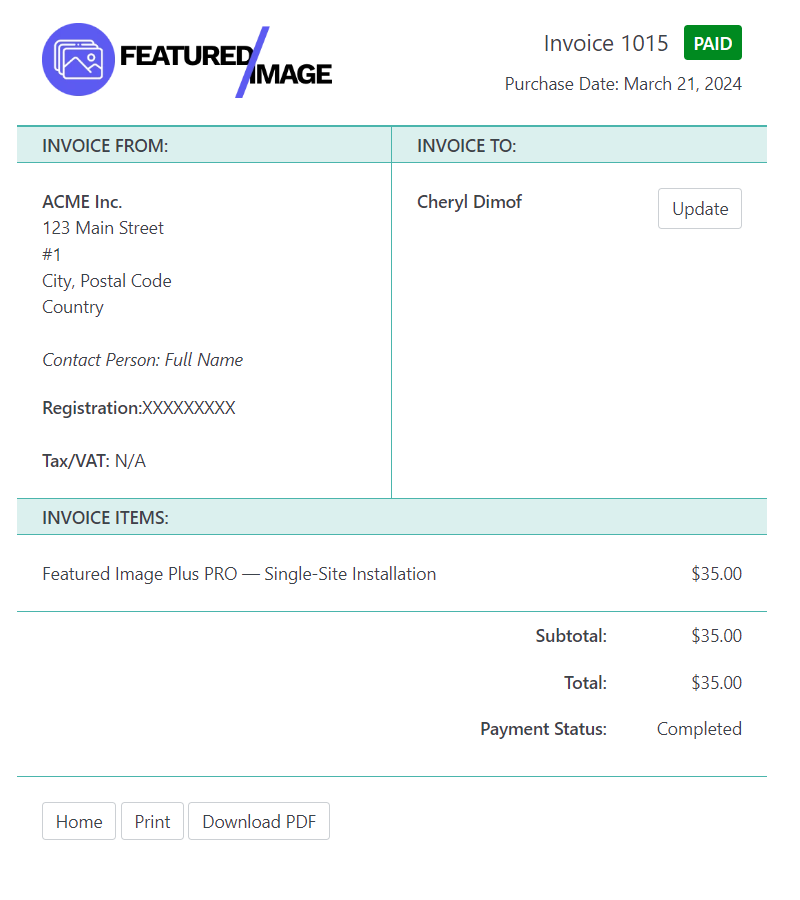
In this tutorial, we’ll explore how to extend the functionality of Easy Digital Downloads (EDD) Invoices specifically for admin users.
A starter child theme including a working example can be downloaded from GitHub.
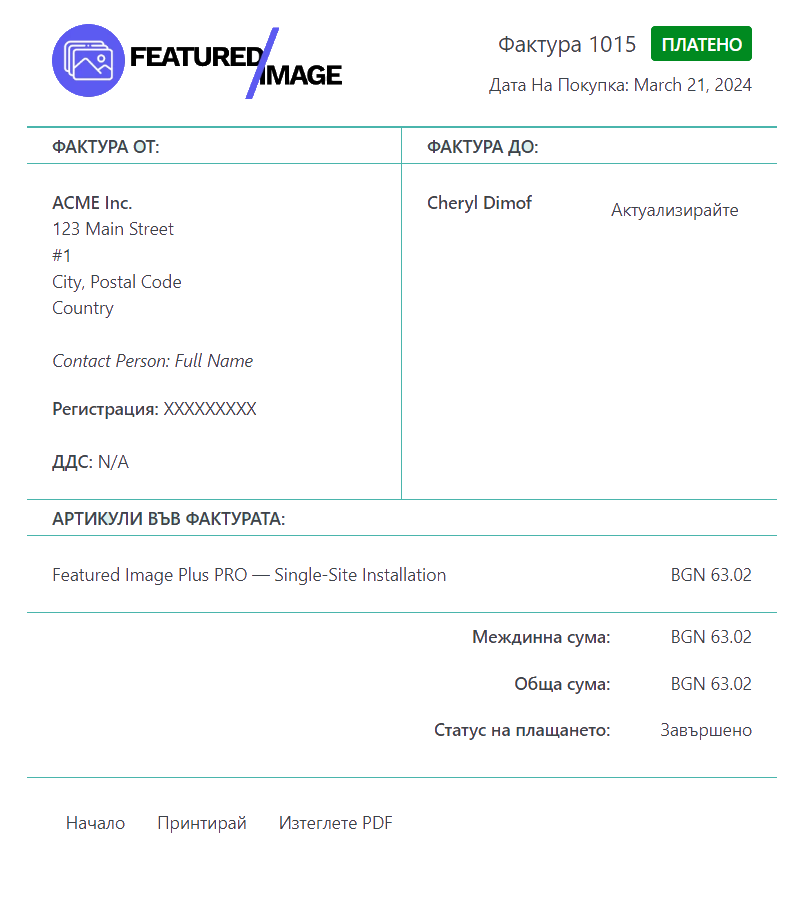
We’ll integrate an API from APILayer to fetch exchange rates and display prices in the local currency. Additionally, we’ll delve into customizing language translations and overriding certain invoice sections to tailor them to our needs.
This comes in handy when you need to generate invoices for accounting in your language and convert the USD/EUR to local currency.
This feature will be only available for Admin users and you can add a toggle under Settings where you can turn it on and off.

Prerequisites
- EDD Invoices Plugin: Ensure you have the EDD Invoices plugin installed and activated on your WordPress site.
- APILayer Account: Register on APILayer and subscribe to the ‘Fixer’ and ‘Exchange Rates Data’ APIs to obtain the necessary API key.
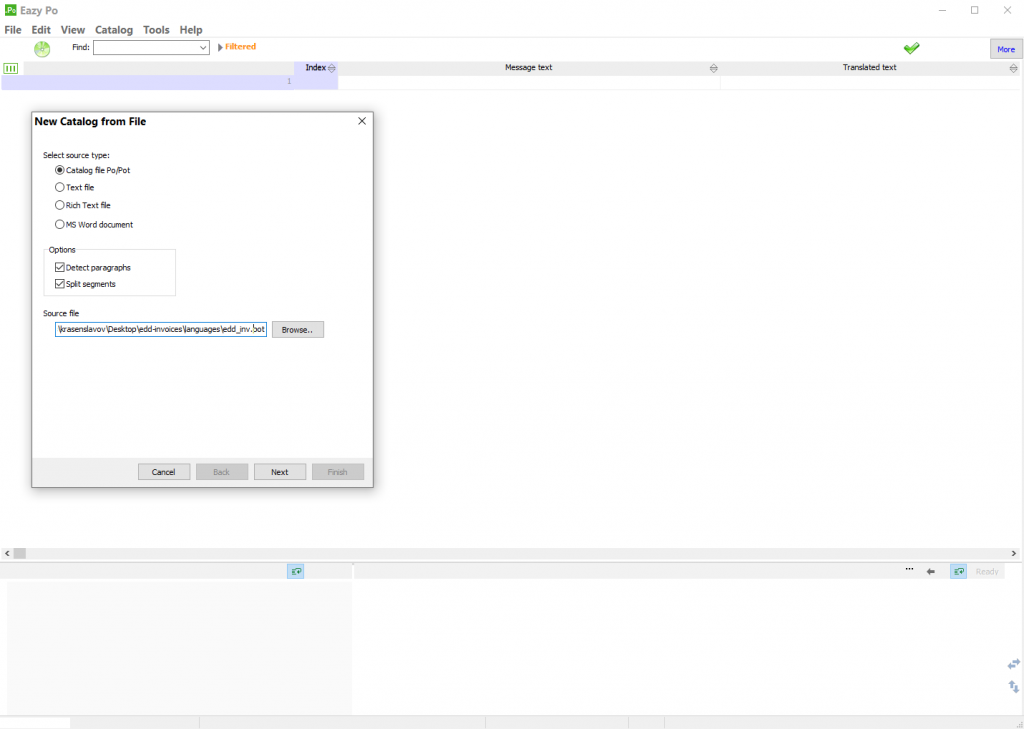
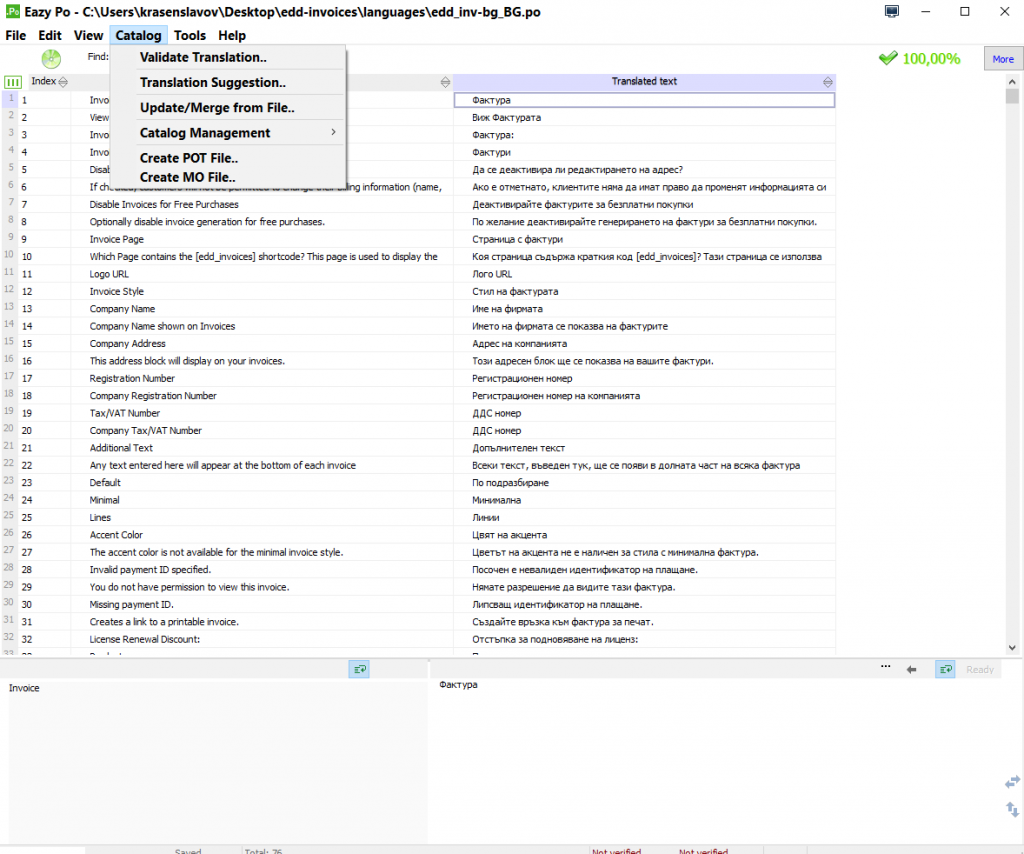
- Eazy Po is a translation editor and a catalog manager for gettext translation files.
Let’s dive into the implementation of creating a child theme first.
Create a Child Theme
To maintain customizations and ensure compatibility with future updates, it’s best practice to create a child theme. This allows you to override parent theme functionality without modifying its core files. Here’s how to create a child theme:
- Create a New Folder: Inside your WordPress themes directory (
wp-content/themes), create a new folder for your child theme. Name it appropriately, e.g.,my-edd-child-theme. - Create
style.css: Inside the child theme folder, create astyle.cssfile. Add the following header information:
/**
 * Theme Name:   My Child Theme
 * Description:  Child theme for Parent Theme
 * Author:       Your Name
 * Template:     parent-theme-folder-name
 * Version:      1.0.0
 */

/** Add your custom CSS below */
Replace My EDD Child Theme with your preferred name.
Create functions.php: In the child theme folder, create a functions.php file. This file will be used to enqueue stylesheets and scripts for your child theme and can also be used to add custom PHP functions.
namespace SLUGSLUG_EDD_INVVOICE;

/**
 * Include extend-edd-invoices.php from /inc.
 */
require_once( get_stylesheet_directory() . '/inc/extend-edd-invoices.php' );

/**
 * Enqueue parent and child theme stylesheets.
 */
function enqueue_theme_styles() {
	// Parent theme stylesheet.
	wp_enqueue_style( 'parent-style', get_template_directory_uri() . '/style.css' );

	// Child theme stylesheet.
	wp_enqueue_style( 'child-style', get_stylesheet_uri() );
}

add_action( 'wp_enqueue_scripts', __NAMESPACE__ . 'enqueue_theme_styles' );
This code enqueues the parent theme’s stylesheet.
Now you have a child theme set up, ready for customizations.
Translate from .pot and Create .po and .mo Files with EazyPo
To translate the EDD Invoices plugin strings, you’ll need to follow these steps using EazyPo:

- Install EazyPo Plugin: Go to Plugins > Add New in your WordPress dashboard, search for “EazyPo,” and install and activate the plugin.
- Navigate to EazyPo: After activating EazyPo, go to Tools > EazyPo in your WordPress dashboard.
- Select Domain: Choose the domain for translation. In this case, it’s
edd-invoices. - Import
.potFile: Click on “Import .pot File” and select the.potfile provided by the EDD Invoices plugin. - Translate Strings: EazyPo will list all translatable strings. Click on each string to provide its translation in your desired language.
- Save Translations: After translating all strings, save your changes.
- Export
.poand.moFiles: Once translations are completed, click on “Generate .mo & .po” to export the translated files. EazyPo will generate.poand.mofiles for your chosen language. - Place Translations in Theme or Plugin: Finally, place the generated
.poand.mofiles in your child theme’slanguagesdirectory if you’re translating strings related to the theme. If translating plugin strings, place them in the respective plugin’slanguagesdirectory.

With these steps completed, your EDD Invoices plugin will now display translated content according to your language preferences.
Extend the EDD Invoices from functions.php
Next, we will create a new file in inc/ named extend-edd-invoices.php where we will put our code to extend the EDD Invoices layout with our custom styles and content.

Below I will quickly explain each section of the file. The main changes are for implementing exchange rates in local currency but if you look at the EDD Invoices /templates you can see that you fully customize your invoices and make them look as close as possible to your brand.
One thing that’s missing is translating dates, but if you want to keep it simple just use the standard date format YYYY-MM-DD
You may also want to replace the SLUG_ with your name.
Define Constants and Settings
We start by defining constants such as base and target currencies, API keys, and company details. Update the placeholders with your actual values.
define( 'SLUG_BASE_CURRENCY', 'USD' );

define( 'SLUG_TARGET_CURRENCY', 'BGN' );

define( 'SLUG_API_LAYER_APIKEY', 'XXXXXXXXXXXXXXXXXXXXXXXXXXXXXXXX' );

define( 'SLUG_COMPANY_ADDRESS', 'ACME Inc.123 Main Street
 #1
City, Postal Code
Country

Contact Person: Full Name' );
Customize Language and Translation
Customize language translations by unloading the original EDD Invoice text domain and loading translations from your preferred language file. This ensures the invoice content is displayed in the desired language.
Override Invoice Sections
Override specific invoice sections to customize their appearance and content. We’ll modify the invoice logo, order heading, contacts, and items table to suit our requirements.
Integrate Exchange Rates
Integrate the APILayer API to fetch exchange rates for converting prices into the target currency. Implement a function to retrieve exchange rates for a specific date and store them in transients to minimize API requests.
Display Prices in Local Currency
Modify the invoice items table to display prices in the local currency. Utilize the exchange rates obtained from the API to convert prices accordingly.
Make API Calls
Implement a function to make API calls to APILayer and fetch the target currency exchange rate for a given date.
Note: I am using the free subscription from two services that return the same JSON format and with transients, you can use the 200 requests limit for small to mid-size stores.
A starter child theme including a working example can be downloaded from GitHub.
By following these steps, you’ve enhanced the EDD Invoices plugin for admin users, allowing for customized invoices with translated content and localized prices. Integrating the APILayer API adds dynamic exchange rate functionality, making it easier to conduct business in multiple currencies.
Feel free to further customize and extend these functionalities based on your specific requirements and preferences.
Happy coding!


