- Version: 1.1.4
- Last Updated: December 18, 2024
- Active Installations: 10+
- PHP Version: 7.4 or higher
- WordPress Version: 5.9 or later
Welcome to the comprehensive guide for Developry X, a dynamic and versatile Bootstrap starter theme crafted to simplify website development.
With 10 unique CSS-colored themes and an extensive range of customization options, Developry X empowers users to create visually stunning and fully functional websites with ease.
This detailed documentation aims to provide in-depth insights into every aspect of the theme, from installation and setup to advanced customization techniques, ensuring that you maximize the potential of Developry X for your web projects.
Installation and Requirements
To kickstart your journey with Developry X, ensure that your server meets the minimum requirements:
- WordPress Version: 5.9 or higher
- PHP Version: 7.4 or higher
Install via WordPress Setup
- Navigate to your WordPress dashboard and access the Themes section under Appearance.
- Click on Add New Theme and search for Developry X.
- Once located, click on Install and then Activate to activate the theme.
Install via WordPress Theme Repository
- Download the Developry X theme.
- Navigate to the Themes section under Appearance in your WordPress dashboard.
- Click on Add New Theme, then select the Upload Theme option to upload the downloaded theme ZIP file.
- After uploading, click on Install and then Activate to activate the theme.
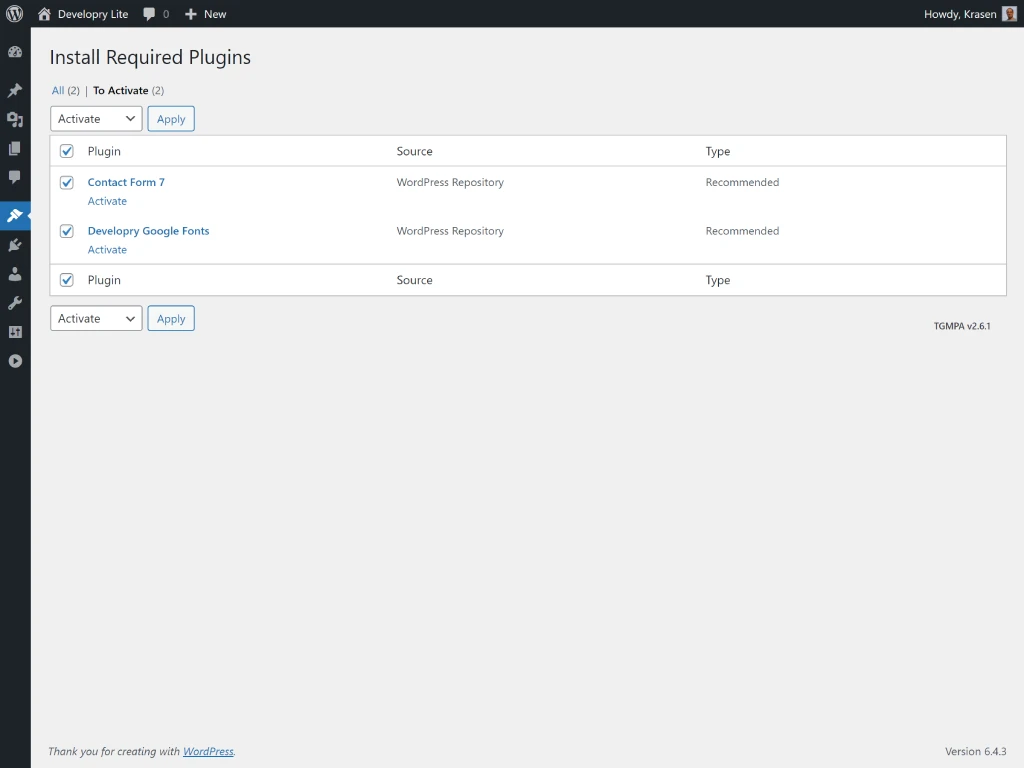
Upon activation, Developry X prompts users to install recommended plugins such as:
- Contact Form 7: A flexible contact form plugin.
- Web Fonts Loader: A plugin for customizing site fonts.
While these plugins are optional, they enhance the functionality and versatility of your website.
Install and Setup Your Starter Website
Expedite your website setup using the Starter Content feature available in the WordPress Customizer. This feature automatically generates default pages, posts, menus, and widgets, providing a solid foundation to kickstart your customization journey.
Automatic Setup
- Navigate to Appearance > Customize in your WordPress dashboard.
- Access the Starter Content feature to generate default website elements.
- Begin customizing your site using the default content as a base.
Manual Setup
If you prefer manual setup, you can download and import the starter content:
- Download the starter content file from here.
- Use the WordPress Importer to upload and integrate the content into your website.
By leveraging these tools, you can quickly create a fully functional website and start tailoring it to your unique needs.
Features
Developry X is packed with a comprehensive set of features, all accessible through the WordPress Customizer. Along with core WordPress theme support, the theme includes several custom options available in the Appearance > Customize > Theme Options panel.
Core Features

- Custom Background Colors: Tailor your website’s background with customizable color options.
- Custom Header and Logo: Personalize your branding by uploading custom headers and logos.
- Custom Menu Editor Style: Preview and adjust page styles directly within the WYSIWYG editor.
- Featured Images and Header Images: Add visual appeal with stunning featured and header images.
- Flexible Header: Align header designs with your website’s aesthetic preferences.
- Footer Widgets: Display additional content or navigation links in the footer widget area.
- Front Page Posting: Showcase your latest posts directly on the homepage.
- Full-Width Template: Create immersive pages with a full-width template for impactful content.
- Sticky Post: Pin important posts to the top of your blog with a “Pinned” indicator.
- Theme Options: Access exclusive custom features for enhanced functionality.
- Threaded Comments: Enable threaded comments to foster engagement and discussions.
- Translation Ready: Translate your content into multiple languages for a global audience.
Additional Highlights
- Starter Content: With one click, generate default pages and posts to jumpstart your new website.
- Navigation Menus: Includes two navigation menus—main and social links—ready for use.
- Responsive Design: Fully responsive to render perfectly on all screen sizes.
- Covers: Add images via thumbnails to the top of posts or pages for visual impact.
- Page Excerpts: Add extra page excerpts to customize your pages further. (Note: Enable this feature via Screen Options.)
- Contact Form 7 Ready: Install the Contact Form 7 plugin to integrate a default contact form on your Contact page.
- Archives Template: Use the archives template page to display your site’s archive.
And so much more to help you create a stunning and functional website!
Custom Theme Features
In addition to the core features, Developry X offers exclusive customizations that are accessible through the WordPress Customizer’s Theme Options panel. These options empower you to personalize your website to align with your brand identity and design preferences.
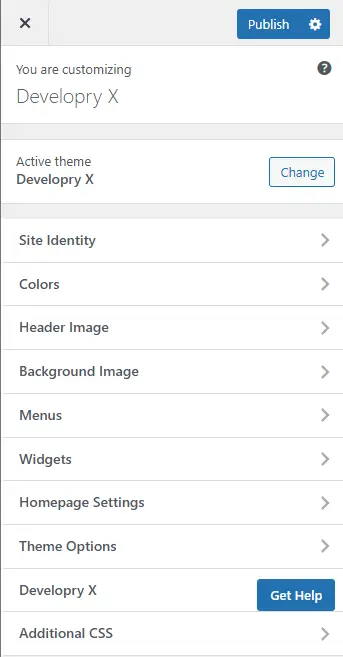
Key Customizations
- Custom Themes: Choose from a diverse selection of color themes to match your brand identity seamlessly.
- Featured Images: Enable or disable featured images at the top of posts and pages to control visual focus.
- Container Width: Opt for a full-screen or fixed container layout to suit your design style.
- Sidebar Management: Adjust sidebar placement (left or right) or hide it entirely for layout flexibility.
- Page Titles: Choose to display, hide, or customize page titles directly within your content.
- Header Styles: Modify header and navbar styles (light or dark colors) based on your selected theme.
- Search Form: Toggle the navbar search form visibility if your site doesn’t require search functionality.
- Background Colors: Customize background colors for major sections of each Bootswatch theme to control light/dark themes. Use the transparent option to overlap elements for a modern design.
Additional Features
Explore advanced features tailored to enhance your website’s functionality and user experience. Developry X ensures your site stands out with thoughtful and versatile customization options.
Tips and Tricks
Unlock the full potential of Developry X with these invaluable tips and tricks:
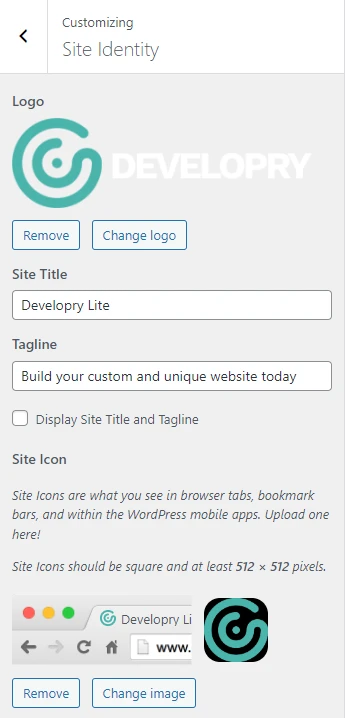
Add Custom Logo and Favicon
Brand your website effectively by uploading custom logos and favicons that reflect your brand identity.
To add a custom logo and favicon, go to Appearance > Customize > Site Identity.
Hint: both images would be cropped accordingly with recommended sizes for the logo being 150×45 and a favicon of 512×512 pixels.

Change Theme Colors and Fonts
Easily customize theme colors and fonts to maintain brand consistency across your website.
Customizing theme colors and fonts is easy with our custom Theme Options; with only one click, you can switch your site styles. To do that, go to Appearance > Customize > Theme Options and change the default Theme option to one of the others.
Available themes are from Bootwatch, where you can see the full view of their styles. In our current version, the following themes are included: Cerulean, Cosmo, Flatly, Journal, Litera, Lumen, Sketchy, United, etc.
Change Container Width
Leverage the full potential of Developry X by creating full-width pages that showcase your content in an immersive manner.
Fine-tune sidebar placement or hide it selectively to optimize space utilization and visual hierarchy.
Changing the width of the main container is also an easy task. To do that, go to Appearance > Customize > Theme Options and change the Container select option.
Fixed (default) container width will change with the window size based on the Bootstrap breaks, while the Fluid container option would always stay 100% even for screens > 1200px.
Hide Page and Post Sidebar
Again another easy task with our custom Theme Options panel. Go to Appearance > Customize > Theme Options and change the Sidebar select option.
The default is the traditional right sidebar, while you can move it to the left of the content or don’t have it showing up at all.
Hint: By using a Full-Width Page template, you can apply no sidebar option to only one page (see next tip)
Enable and Update Page and Post Covers
Enhance visual storytelling by incorporating cover images for pages and posts, creating a captivating user experience.
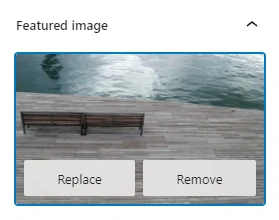
Having cover-type images is very easy as well. Firstly, you need to enable the custom Theme Options field for Featured Image to show. Just go to Appearance > Customize > Theme Options and make the update.
Step two is to add/update the Featured Image to your post or page.
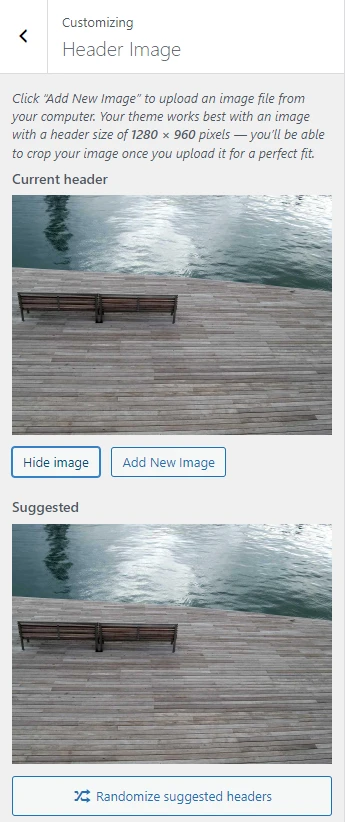
Note: A default image would be attached for posts and pages without Featured images (except the main blog page). However, you can change this and even have multiple randomized images via the Appearance > Customize > Header Image panel (see below for additional help).
Create a Full-width Page (without sidebar)
If you need a page without a sidebar, all you need to do is go to the desired page and change the Default Template to Full Width (no sidebar).
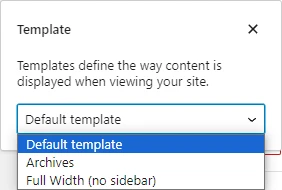
Note: Titles for full-width pages are not shown in the content area, and they’re used for the cover body overlay block.
Change the Default blank/empty Cover Image
While your Theme Options featured image is enabled, you will have a default / blank image loaded for posts and pages without featured images. If you want to change the default blank image with our theme or have multiple randomized images showing as covers, you need to go to Appearance > Customize > Header Image and upload your new placeholder(s).
Adding your Copyright Text
Personalize footer copyright text and social links to establish a cohesive brand identity and improve user engagement.
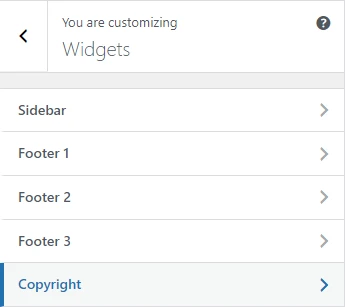
Changing the footer copyright text format is very easy as well. It would help if you went to Appearance > Widgets > Copyright or Appearance > Widgets and then added Text Widget to the Copyright widget block with your text formatted as you would like.
Note: This will change the default © 2018 [Your site title linked]. All rights reserved. With the Text Widget content change the layout of the footer slightly.
Update the Footer Nav Social Links
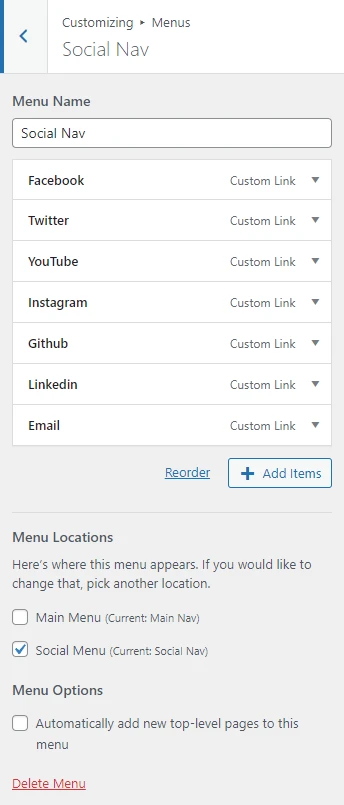
If you have a footer nav menu created and assigned, there are six available links for social networks like Facebook, Twitter, Youtube, Instagram & Github, or Email Addresses.
If you load the Starter Content, these links will have some default targets; to change those, go to Appearance > Customize > Menus > Social Nav or Appearance > Menus and select Social Nav.
Download and Compatibility
Developry X is available for download from the official WordPress Theme repository, ensuring hassle-free installation and updates. The theme is fully compatible with the latest version of WordPress 5.9 and PHP 7.4 or higher, guaranteeing seamless integration with your website environment.
License and Credits
Developry X is licensed under the GNU General Public License, emphasizing freedom and flexibility in its usage. Credits are attributed to various software components within the readme.txt and resources utilized in the development of the theme, including WordPress, Bootstrap, Bootswatch, jQuery, and font and image providers.
FAQs
For assistance and inquiries, utilize the Support tab on the theme page. Our dedicated support team strives to address all queries promptly, ensuring a smooth and enjoyable user experience for all Developry X users.
We trust that this comprehensive guide will serve as an invaluable resource in harnessing the full potential of Developry X for your web projects.
Is Developry X Free?
Yes, Developry X is a free theme and always will be.
Does Developry X have a Pro version?
Yes, it does. Developry X has a Pro available with more custom options.
You can learn more about Developry X Pro here.
Where can I find documentation?
Developry X has extensive documentation you can find here.
Do you offer support?
We offer support for the free theme on the Developry Themes website.
Where can I find the theme options?
All of our options can be found in the Customizer in Appearance > Customize > Theme Options.
Does Developry X have any widget areas?
Developry X has up to 5 widget areas to which you can add widgets to in Appearance > Widgets.
Whether you’re a seasoned developer or a novice user, we’re committed to providing the guidance and support you need to create exceptional websites.
Should you require further assistance or have any questions, please don’t hesitate to reach out. Your success is our priority.
