


Last Updated 2/19/2021
| Type | Expertise | Reading Time | Completion Time |
|---|---|---|---|
| Tutorial | Intermediate | 40 – 60 minutes | 2 – 4 hours |
Table of Contents
- Prerequisites
- Introduction
- Digital Ocean
- Create a New Project
- Create a New Cloud Server (Droplet)
- Add a Domain
- Update Domain DNS Records (e.g. Google Domains)
- Login to your Cloud Server
- Cloud Server
- Web Server
- WordPress
- Addons
- Conclusion
1. Prerequisites
This is an intermediate-level tutorial. To follow and complete all the topics discussed, you must have some previous Unix/Linux experience under your belt.
There are a couple of advanced items at the end, but most of the topics shouldn’t be a problem to follow for someone that’s using Ubuntu as their primary OS on his home/workplace machine.
I would recommend going over the basic Linux commands and reading the Command Line for Beginners by Ubuntu for beginner users. Then install the WordPress App from Digital Ocean, and after you feel comfortable within the command line, you come back and try to cover some of the topics discussed in this tutorial.
If you check all the items below and have a basic understanding of each one, you should be able to follow along with this tutorial.
- Feel comfortable with the Terminal.
- Navigate the Linux filesystem.
- File manipulations – manage (add, edit, remove), preview, edit, copy and move files and directories.
- Set ownership and permissions.
- Understand the Linux Filesystem Hierarchy Standard – know where are your configs, logs, executables, etc. located.
- Basic understanding of ufw Linux Firewall, apt package manager, and systemctl service manager.
- Be able to find help and read the man pages for programs and packages available on your system.
2. Introduction
This tutorial will show you how to set up, install, and configure your cloud server on Digital Ocean and set up and secure your first WordPress website.
Moreover, you will learn how to configure Postfix with IMAP-server and RoundCube, install PHPMyAdmin, switch from Apache to Nginx, and install and configure a secure FTP connection.
This is a full step-by-step tutorial that shows you how to do it on a clean Ubuntu 20.04.2 LTS installation.
If you wish to have an automated installation, you should look at the WordPress App available on the Digital Ocean marketplace. However, I cover many more topics and programs in this tutorial, so once you install the app and play with it for a bit, you may want to come back to this tutorial again and try to build on what you have.
3. Digital Ocean
After creating a new account with Digital Ocean and logging in to your web interface, you are ready to create and set up your first cloud server (Droplet). Below I will describe this process step-by-step.
The green button Create in the top toolbar can access all the items below.
Create a New Project
- Name your project: PROJECT NAME
- Add a description: Some description…
- Tell us what it is for: Website or blog
- Click on the Create Project button
- Skip Move resources into…
Create a New Cloud Server (Droplet)
- Select a distribution: Ubuntu
- Choose a plan: Basic $5
- Choose a datacenter region: Select One
- Select additional options: IPv6, Monitoring
- Authentication: Password
- Create root password:
- Choose a hostname: projectname
- Select project: PROJECT NAME
Add a Domain
- Enter domain: domain.com
- Select project: PROJECT NAME
- Add A record
- Hostname: @
- Will director to: IP Address
- TTL (seconds): 3600
- Click on the Create Record button
- Add CNAME record
- Hostname: www
- Is an alias of: @
- TTL (seconds): 43200
- Click on the Create Record button
The final domain DNS records table should look similar to the output below.
CNAME   www.domain.com   is an alias of   domain.com.           43200
A	domain.com       directs to       111.111.111.111        3600
NS	domain.com       directs to       ns1.digitalocean.com   1800
NS	domain.com       directs to       ns2.digitalocean.com   1800
NS	domain.com       directs to       ns3.digitalocean.com   1800
Update Domain DNS Records (e.g. Google Domains)
You need to change your domain name DNS records to point to the Digital Ocean nameservers. For example, if you host your domain on Google Domains, you need to do the following:
- go to My Domain > DNS (from the side menu)
- Check Use custom name servers:
- Click on the + sign to add a new nameserver and add each of the following in a separate row: ns1.digitalocean.com, ns2.digitalocean.com, ns3.digitalocean.com
- At the end click on the Save button.
Login to your Cloud Server
At this point, all the configurations within the Digital Ocean web interface are completed, and we are ready to log in to our cloud server for the first time. We will use the root user with the password set when creating our Droplet.
If you are new to SSH, the easiest way to connect to your cloud server is with a program called PuTTY on Windows or Cyberduck on Mac. If you are a Linux user, you should probably know how to connect with OpenSSH.
Here is an example of step-by-step logging in with PuTTY on Windows.
- Download PuTTY
- Open the PuTTY executable file and enter:
- Host Name (or IP address): Droplet IP Address or domain
- Port: 22
- Connection type: SSH
- Saved Session: Digital Ocean Project Name
- Click on the Save button for later use
- Click on the Open button
Once you enter the root and correct password, you will be logged in successfully to your cloud server.
login as: root
root@111.111.111.111's password:
Welcome to Ubuntu 20.04.2 LTS (GNU/Linux 5.4.0-65-generic x86_64)
4. Cloud Server
Before setting up our Web Server, we should do some initial server updates and configuration.
Update and Upgrade your Server
Using the apt package manager, you must update and upgrade all the software initially installed on the server (answer all the questions you get during the process with Y).
# apt update && apt upgradeTo not compromise your server security, all the applications and software installed must be up to date, and you will need to run the above command regularly, create a cron job and automate the process.
Add New User and Disable root Login
Since we use the root password authentication method and do not authenticate with public and private SSH keys, it is best to disable our root access and improve our cloud server security level.
# nano /etc/ssh/sshd_config
PermitRootLogin no
PasswordAuthentication yes
Moreover, we need to create a new superuser that will be used to access and control our server.
The following sequence will create and test the user and restart the sshd service.
Next time you log in, you won’t do it as root. You should use the newly created superuser to log in and then type su username, so you don’t run all your commands with root access.
# adduser username
New password:
Retype new password:
passwd: password updated successfully
Changing the user information for username
Enter the new value, or press ENTER for the default
  Full Name []:
  Room Number []:
  Work Phone []:
  Home Phone []:
  Other []:
Is the information correct? [Y/n] Y
# usermod -aG sudo,www-data username
# su username
Password:
$ id username
uid=1000(username) gid=1000(username) groups=1000(username),27(sudo),33(www-data)
$ exit
# systemctl restart sshd
# exit
If you mess up anything or forget your password, don’t worry, you are not completely locked out. Go to your Digital Once Droplet web interface click on the Access link from the side menu.
This is where you can either select to Launch Recovery Console or Reset Root Password and regain access to your cloud server Droplet.
DNS Propagation Check
Before we go ahead and start installing and configuring our Web Server, let us check if the domain name we have added earlier is pointing to the correct IP Address.
Sometimes DNS changes may take up to 72 hours to see the result on our end.
Firstly, we can run the ip addr show eth0 command to preview the IP Address of our cloud server. And then type any of the commands below to check if the domain IP Address matches the one from our cloud server.
# ip addr show eth0 | grep inet | awk '{ print $2; }' | sed 's//.*$//'
111.111.111.111
# dig domain.com
;; ANSWER SECTION:
domain.com.        3600    IN      A       111.111.111.111
# nslookup domain.com
Non-authoritative answer:
Name:    domain.com
Address: 111.111.111.111
# ping domain.com
PING domain.com (111.111.111.111) 56(84) bytes of data.
64 bytes from domain (111.111.111.111): icmp_seq=1 ttl=64 time=0.017 ms
Sometimes there is an issue with your local machine DNS cache, and you may still see the old domain.com loading in your browser even the propagation was completed. To resolve this search for how to flush DNS cache on Google, you will find the correct solution for your OS.
5. Web Server
From now on, you must run all root commands and software access with sudo before them. After you log in, you should start with su username (once in a while, you will be asked to re-enter your user password for authentication).
Install All the Required Software
Firstly, we need to install all the software we need for our Web Server. To do this, we will use the apt package manager again.
$ sudo apt install apache2 mysql-server php php-mysql certbot python3-certbot-apache postfix s-nail - Confirm all questions with Y
- When you get the Postfix initial configuration just select OK > Internet Site > OK and domain.com for mail name.
If you are stuck and don’t know how to use any program, or you wonder if it is even installed on your system, you can run man <command> or <command> --help. In addition, typing -v or –version after each program or command will show you the installed version. Or if you know the package name type sudo apt show <package> , see detailed information about the package.
As a reference, below are all the software versions for the Web Server I am using for this tutorial.
$ sudo cat /etc/os-release
NAME="Ubuntu"
VERSION="20.04.2 LTS (Focal Fossa)"
ID=ubuntu
ID_LIKE=debian
PRETTY_NAME="Ubuntu 20.04.2 LTS"
VERSION_ID="20.04"
$ sudo apache2 -v
Server version: Apache/2.4.41 (Ubuntu)
Server built:   2020-08-12T19:46:17
$ sudo mysql --version
mysql  Ver 8.0.23-0ubuntu0.20.04.1 for Linux on x86_64 ((Ubuntu))
$ sudo php -v
PHP 7.4.3 (cli) (built: Oct  6 2020 15:47:56) ( NTS )
$ sudo postconf -d | grep mail_version
mail_version = 3.4.13
$ sudo certbot --version
certbot 0.40.0
Configure the Linux Firewall
We are now ready to configure, open some ports, and enable our firewall. This is something we need to do to allow the outside world to access our cloud server.
$ sudo ufw app list
Available applications:
  Apache
  Apache Full
  Apache Secure
  OpenSSH
  Postfix
  Postfix SMTPS
  Postfix Submission
$ sudo ufw status
Status: inactive
$ sudo ufw limit 'OpenSSH'
$ sudo ufw allow 'Apache Full'
$ sudo ufw allow 'Postfix'
$ sudo ufw enable
Command may disrupt existing ssh connections. Proceed with operation (y|n)? y
Firewall is active and enabled on system startup
$ sudo ufw status
Status: active
To                         Action      From
--                         ------      ----
OpenSSH                    LIMIT       Anywhere
Apache Full                ALLOW       Anywhere
Postfix                    ALLOW       Anywhere
OpenSSH (v6)               LIMIT       Anywhere (v6)
Apache Full (v6)           ALLOW       Anywhere (v6)
Postfix (v6)               ALLOW       Anywhere (v6)
$ sudo systemctl status apache2
● apache2.service - The Apache HTTP Server
   Loaded: loaded (/lib/systemd/system/apache2.service; enabled; vendor preset: enabled)
   Active: active (running) since Sat 2021-02-13 08:30:58 UTC; 13h ago
If you complete all the steps above and the apache service is active and running as a background process, you can go ahead, open your favorite browser and enter http://domain.com. This will show you the default Apache web server index page. The document root for the default Apache server is located at /var/www/html.
If Apache isn’t running, you should start it with sudo systemctl start apache2.
Create and Configure a Virtual Host
If you are running only one domain within a Droplet, you don’t need to set up virtual hosts. However, if you plan to have subdomains or host multiple websites on a single cloud server, then learning to create and configure a virtual host is a must.
The process is pretty straightforward, and after you do it a couple of times, you should be able to add a new virtual host in no time. Here are the steps required:
- Create the file and directory structure.
- Assign the appropriate user and group ownership.
- Create a config file and enable your virtual host within Apache.
$ sudo chmod -R 755 /var/www
$ sudo mkdir -p /var/www/domain.com/html/.logs
$ sudo chown -R www-data:www-data /var/www/domain.com/html
$ sudo chown -R $USER:$USER /var/www/domain.com/html/.logs
$ sudo nano /var/www/domain.com/html/index.html
<html><head><title>Hello World!</title></head><body><h1>Hello World</h1></body></html>
$ sudo nano /var/www/domain.com/html/phpinfo.php
<?php phpinfo(); ?>
$ sudo cp /etc/apache2/sites-available/000-default.conf /etc/apache2/sites-available/domain.com.conf
$ sudo nano /etc/apache2/sites-available/domain.com.conf
<VirtualHost *:80>
  ServerName domain.com
  ServerAlias www.domain.com
  ServerAdmin webmaster@domain.com
  DocumentRoot "/var/www/domain.com/html"
  DirectoryIndex index.php index.html
  <Directory "/var/www/domain.com/html">
    Options Indexes FollowSymLinks MultiViews
    AllowOverride All
    Order deny,allow
    Allow from all
  </Directory>
  ErrorLog "/var/www/domain.com/html/.logs/error.log"
  CustomLog "/var/www/domain.com/html/.logs/access.log" common
</VirtualHost>
$ sudo a2dissite 000-default.conf
$ sudo a2ensite domain.com.conf
$ sudo systemctl restart apache2
There are a couple more steps added above for you to visualize the final result, but at this point, all your files associated with http://domain.com will be served from /var/www/domain.com/html/ instead of /var/www/html.
If you wish to add another domain or subdomain, you follow the same procedure just replace domain.com with the new domain or subdomain name.
Add SSL Support for https:// with HTTP/2
Serving your site via SSL isn’t any more a recommendation nowadays but a requirement. For this, we will use the certbot program we installed earlier, and the process is straightforward to follow.
$ sudo certbot --apache -d domain.com -d www.domain.com
Enter email address (used for urgent renewal and security notices) (Enter 'c' to
cancel): webmaster@domain.com
- - - - - - - - - - - - - - - - - - - - - - - - - - - - - - - - - - - - - - - -
Please read the Terms of Service at
https://letsencrypt.org/documents/LE-SA-v1.2-November-15-2017.pdf. You must
agree in order to register with the ACME server at
https://acme-v02.api.letsencrypt.org/directory
- - - - - - - - - - - - - - - - - - - - - - - - - - - - - - - - - - - - - - - -
(A)gree/(C)ancel: A
- - - - - - - - - - - - - - - - - - - - - - - - - - - - - - - - - - - - - - - -
Would you be willing to share your email address with the Electronic Frontier
Foundation, a founding partner of the Let's Encrypt project and the non-profit
organization that develops Certbot? We'd like to send you email about our work
encrypting the web, EFF news, campaigns, and ways to support digital freedom.
- - - - - - - - - - - - - - - - - - - - - - - - - - - - - - - - - - - - - - - -
(Y)es/(N)o: Y
- - - - - - - - - - - - - - - - - - - - - - - - - - - - - - - - - - - - - - - -
Please choose whether or not to redirect HTTP traffic to HTTPS, removing HTTP access.
- - - - - - - - - - - - - - - - - - - - - - - - - - - - - - - - - - - - - - - -
1: No redirect - Make no further changes to the webserver configuration.
2: Redirect - Make all requests redirect to secure HTTPS access. Choose this for
new sites, or if you're confident your site works on HTTPS. You can undo this
change by editing your web server's configuration.
- - - - - - - - - - - - - - - - - - - - - - - - - - - - - - - - - - - - - - - -
Select the appropriate number [1-2] then [enter] (press 'c' to cancel): 2
$ sudo certbot renew --dry-run
$ sudo cat /etc/apache2/sites-available/domain.com-le-ssl.conf
<IfModule mod_ssl.c>
  <VirtualHost *:443>
    ServerName domain.com
    ServerAlias www.domain.com
    ServerAdmin webmaster@domain.com
    DocumentRoot "/var/www/domain.com/html"
    DirectoryIndex index.php index.html
    <Directory "/var/www/domain.com/html">
      Options Indexes FollowSymLinks MultiViews
      AllowOverride All
      Order deny,allow
      Allow from all
    </Directory>
    ErrorLog "/var/www/domain.com/html/.logs/error.log"
    CustomLog "/var/www/domain.com/html/.logs/access.log" common
    SSLCertificateFile /etc/letsencrypt/live/domain.com/fullchain.pem
    SSLCertificateKeyFile /etc/letsencrypt/live/domain.com/privkey.pem
    Include /etc/letsencrypt/options-ssl-apache.conf
  </VirtualHost>
</IfModule>
The last two commands verify if the certificate is generated successfully and show you the new config file with SSL support.
Now you can open your site with https://, and all the http:// requests will be automatically redirected to https:// as specified above.
Enable HTTP/2
The default Apache 2.4 doesn’t come with HTTP/2 support enabled. Luckily making the switch from HTTP/1.1 to HTTP/2 is not that complicated.
The steps we need to follow to do the switch are:
- Tell Apache to use PHP FastCGI
- Change MPM from “prefork” to “event”
- Update your SSL Virtual Host file
- Enable the mod_http2 Apache module
$ sudo add-apt-repository ppa:ondrej/apache2
$ sudo apt install php7.4-fpm
$ sudo a2enmod proxy_fcgi setenvif
$ sudo a2enconf php7.4-fpm
$ sudo a2dismod php7.4
$ sudo a2dismod mpm_prefork
$ sudo a2enmod mpm_event
$ sudo nano /etc/apache2/sites-available/domain.com-le-ssl.conf
#Add the following configuration lines at end of the file

    Protocols h2 h2c http/1.1
  </VirtualHost>
</IfModule>
$ sudo a2enmod http2
$ sudo systemctl restart php7.4-fpm
$ sudo systemctl restart apache2
To test if you have successfully enabled HTTP/2, you can either go to your browser DevTools and check the Header Request for any of the loaded resources or just run the command below, and you should get HTTP/2 200.
$ sudo curl -sSL -D - domain.com -o /dev/null
HTTP/2 200
date: Fri, 19 Feb 2021 22:58:16 GMT
server: Apache/2.4.41 (Ubuntu)
link: <https://perfomentor.com/wp-json/>; rel="https://api.w.org/"
cache-control: max-age=172800
expires: Sun, 21 Feb 2021 22:58:16 GMT
vary: Accept-Encoding
content-type: text/html; charset=UTF-8
Configure and Secure the MySQL Server
Let us move along to configure and secure our MySQL server. As you might already know, we need a username, password, and database to install WordPress. But before we do that, let us improve the security of our MySQL Server and update the root password.
If MySQL isn’t running, you should start it with sudo systemctl start mysql.
$ sudo systemctl status mysql
● mysql.service - MySQL Community Server
  Loaded: loaded (/lib/systemd/system/mysql.service; enabled; vendor preset: enabled)
  Active: active (running) since Sat 2021-02-13 08:14:36 UTC; 14h ago
$ sudo mysql_secure_installation
Press y|Y for Yes, any other key for No: Y
Please enter 0 = LOW, 1 = MEDIUM and 2 = STRONG: 1
New password:
Re-enter new password:
Remove anonymous users? (Press y|Y for Yes, any other key for No) : Y
Disallow root login remotely? (Press y|Y for Yes, any other key for No) : Y
Remove test database and access to it? (Press y|Y for Yes, any other key for No) : Y
Reload privilege tables now? (Press y|Y for Yes, any other key for No) : Y
$ sudo mysql -u root -p
mysql> SELECT user, authentication_string, plugin, host FROM mysql.user;
mysql> ALTER USER 'root'@'localhost' IDENTIFIED WITH mysql_native_password BY 'password';
mysql> FLUSH PRIVILEGES;
mysql> SELECT user, authentication_string, plugin, host FROM mysql.user;
Of course, replace your username and password with your own.
It is not recommended, but if you wish your user to access all databases, you can replace the WordPress.* with *.*.
And then, if you want to limit the privileges, you can replace ALL with any of the actions from the following list: CREATE, ALTER, DROP, INSERT, UPDATE, DELETE, SELECT, REFERENCES, RELOAD.
mysql> CREATE DATABASE wordpress;
mysql> CREATE USER 'username'@'localhost' IDENTIFIED BY 'password';
mysql> GRANT ALL PRIVILEGES ON wordpress.* TO 'username'@'localhost';
mysql> FLUSH PRIVILEGES;
mysql> QUIT;
$ sudo mysql -u username -p
Enter password:
mysql> SHOW DATABASES;
+--------------------+
| Database           |
+--------------------+
| information_schema |
| wpblueprint        |
+--------------------+
2 rows in set (0.01 sec)
mysql> QUIT;
Configure PHP and Manage Extensions
I won’t be able to cover everything here regarding php.ini, but I want to give you some common PHP configuration settings you might want to update. Also, a way to preview, add, and remove extensions and install packages with apt.
I am using PHP 7.4 as of the writing of this tutorial, but if you have a newer version, you should change the path to php.ini appropriately.
$ sudo nano /etc/php/7.4/apache2/php.ini
;Add the following configuration lines at end of the file

register_globals = Off
allow_url_fopen = On
memory_limit = 128M
max_execution_time= 300
max_input_time= -1
upload_max_filesize= 25M
post_max_size= 20M
The first two commands can search or preview installed PHP modules and packages. Then you can use either a2enmod or a2dismod to manage them.
$ php -m
$ sudo dpkg --get-selections | grep -v deinstall | grep php
$ sudo a2enmod deflate
$ sudo a2enmod rewrite
$ sudo a2dismod headers
$ sudo systemctl restart apache2
If you need to install a PHP extension as a module, you can use the apt package manager to search and install or remove it.
$ sudo apt search php-
$ sudo apt install <php-module>
$ sudo apt remove <php-module>
After removing a package, run sudo apt auto-remove to get rid of all the dependencies left on your server.
Install and Configure PHP OPcache
Opcache is a powerful PHP extension used to increase PHP performance by storing precompiled script bytecode in shared memory.
$ sudo apt install php-opcache
$ sudo nano nano /etc/php/7.4/apache2/php.ini
;Add the following configuration lines at end of the file

opcache.enable=1
opcache.memory_consumption=128
opcache.max_accelerated_files=3000
opcache.revalidate_freq=200
$ sudo systemctl restart apache2
Upgrade to PHP 8
[Coming Soon]
6. WordPress
Our initial Web Server should now be configured, and we can go ahead, install and configure our WordPress.
Install WP-CLI
Firstly, let us install WP-CLI to speed up the process. Of course, you can do this by downloading the latest WordPress vision, unzipping, and then installing via your browser, but since we are in the console, using WP-CLI is much more efficient.
The commands below will download, set permissions and make the WP-CLI executable global to our system.
$ sudo curl -O https://raw.githubusercontent.com/wp-cli/builds/gh-pages/phar/wp-cli.phar
$ sudo chmod +x wp-cli.phar
$ sudo mv wp-cli.phar /usr/local/bin/wp
$ sudo wp --info
OS:     Linux 5.4.0-65-generic #73-Ubuntu SMP Mon Jan 18 17:25:17 UTC 2021 x86_64
Shell:  /bin/bash
PHP binary:     /usr/bin/php7.4
PHP version:    7.4.3
php.ini used:   /etc/php/7.4/cli/php.ini
WP-CLI root dir:        phar://wp-cli.phar/vendor/wp-cli/wp-cli
WP-CLI vendor dir:      phar://wp-cli.phar/vendor
WP_CLI phar path:       /home/username
WP-CLI packages dir:
WP-CLI global config:
WP-CLI project config:
WP-CLI version: 2.4.0
Install and Configure WordPress
Once we have WP-CLI installed, we will install and configure our WordPress. I will run all the commands as root and then, in the next section, fix all the permissions and ownership of our files and directories.
$ sudo wp core download --path=/var/www/domain.com/html --allow-root
Success: WordPress downloaded.
$ sudo wp config create --path=/var/www/domain.com/html --dbname=wordpress --dbuser=<username> --dbpass=<password> --allow-root
Success: Generated 'wp-config.php' file.
$ sudo wp core install --path=/var/www/domain.com/html --url=https://domain.com --title=WordPress --admin_user=<username> --admin_password=<password> --admin_email=webmaster@domain.com --allow-root
Success: WordPress installed successfully.
Secure WordPress Files and Directories
We are almost ready, but before that, let us secure our WordPress installation. Also, if you need to secure your WordPress further, I would recommend using either Sucuri Security or WordFence plugins.
$ sudo chown -R www-data:www-data /var/www/domain.com/html
$ sudo chmod 640 /var/www/domain.com/html/wp-config.php
$ sudo find /var/www/domain.com/html -type d -exec chmod 755 {} ;
$ sudo find /var/www/domain.com/html -type f -exec chmod 644 {} ;
If you plan to do web development and need write access for themes and plugins, you can temporarily allow it.
Remember when we created our superuser initially, we added it to the www-data group. We will use the same user to log in once we set up our FTP (for better security, you should consider creating a new user with FTP-only privileges, lock it to the document root directory and disable his SSH access, I do show you how to do that in the Addons section).
$ sudo find /var/www/domain.com/html/wp-content/themes/ /var/www/domain.com/html/wp-content/plugins/ -type d -exec chmod 775 {} ;
$ sudo find /var/www/domain.com/html/wp-content/themes/ /var/www/domain.com/html/wp-content/plugins/ -type f -exec chmod 664 {} ;
At this point, your WordPress is installed, secured and you can go ahead and open your domain to preview the fresh install. Then go WP Admin, log in with the specified user and password, and start building your site.
Configure and Create a Staging Site
You need to have this if you do any web development work on your site, and it is never a good idea to work on your production site.
You need to navigate your Digital Ocean web interface domain area and add an A record with hostname staging.
A staging.domain.com directs to 111.111.111.111 3600Next, before we do anything else, we need to make a backup for our production website, including the database. Running the commands below will create these backups and store them in the /var/backups directory.
If you want regular backups of your site, you can either pay Digital Ocean to do this for you as an extra service or create a cron job using the commands below.
$ now=`date +"%m-%d-%y"`
$ sudo tar cvzf /var/backups/domain.com-${now}.tar.gz /var/www/domain.com
$ sudo mysqldump -u root -p database > database-${now}.sql | sudo mv database-${now}.sql /var/backups
Enter password:
$ ls -al /var/backups
-rw-r--r--  1 root root  1036864 Feb 15 16:30 database-02-15-21.sql
-rw-r--r--  1 root root 31644895 Feb 15 15:06 domain.com-02-15-21.tar.gz
The next step is to create the directory structure for our staging, copy all the files from production to staging, create a staging database, update user privileges, update the DB_NAME in the wp-config.php file replace the main domain with a subdomain in our staging database.
$ sudo mkdir -p /var/www/staging.domain.com
$ sudo cp -rf /var/www/domain.com/html /var/www/staging.domain.com
$ sudo mysql -u root -p -e "create database database_staging"
Enter password:
$ sudo mysqldump database | sudo mysql -u root -p database_staging
Enter password:
$ sudo mysql -u root -p -e "GRANT ALL PRIVILEGES ON database_staging.* TO 'username'@'localhost'; FLUSH PRIVILEGES;"
Enter password:
$ sudo nano /var/www/staging.domain.com/html/wp-config.php
define( 'DB_NAME', 'database_staging' );
$ sudo nano /var/www/staging.domain.com/html/wp-cli.local.yml
path: .
url: http://staging.domain.com
$ cd /var/www/staging.domain.com/html
$ wp search-replace 'https://domain.com/' 'http://staging.domain.com/'
Success: Made 188 replacements.
And the final step is to create a config file for our subdomain, enable it, and restart Apache. Same as we did go our primary domain but without SSL support.
$ sudo nano /etc/apache2/sites-available/staging.domain.com.conf
<VirtualHost *:80>
  ServerName staging.domain.com
  ServerAlias www.staging.domain.com
  ServerAdmin webmaster@staging.domain.com
  DocumentRoot "/var/www/staging.domain.com/html"
  DirectoryIndex index.php index.html
  <Directory "/var/www/staging.domain.com/html">
    Options Indexes FollowSymLinks MultiViews
    AllowOverride All
    Order deny,allow
    Allow from all
  </Directory>
  ErrorLog "/var/www/staging.domain.com/html/.logs/error.log"
  CustomLog "/var/www/staging.domain.com/html/.logs/access.log" common
</VirtualHost>
$ sudo a2ensite staging.domain.com.conf
$ sudo systemctl restart apache2
At this point, you can go ahead open http://staging.domain.com and start your development process.
Note that if your production domain is set up with www., you need to change the search-replace URL.
Push Staging to Production
Once you are done with your development, troubleshooting, or testing on staging, you may wonder how to push it to production.
First things first, create a backup of your production site, including the database as shown earlier.
Then you can revert the above process, but an easier solution is to use a plugin. I highly recommend All-in-One WP Migration, but you can, of course, use another one.
With the above plugin, you create a single file of your staging with the .wpress extension. Then go to your production site and import the staging with all the changes and updates. Beware will wipe out everything from your production site (this is why backups are important).
Secondly, you need to change the URLs from http://staging.domain.com to https://domain.com. Again, you may use a plugin, and I recommend the Velvet Blues Update URLS one. At this point, your production site will be all good.
Other things to consider while updating production and changing URLs are installing a maintenance mode plugin, e.g., WP Maintenance Mode, so visitors won’t see broken sites while migrating.
Automate the Production <> Staging Process
[Coming Soon]
Setup Visual Studio Code for Remote Development with SSH
Go to Visual Studio Code marketplace, search, and install Remote-SSH.
Next, use the shortcut Ctrl+Shift+P, search for Remote-SSH: Open Configuration File… and select C:UsersUser.sshconfig if you are on Windows (possible SSH paths for macOS, ~/. ssh‘, and Linux, /root/.ssh).
Host MyRemoteServer
  HostName 111.111.111.111
  User root
  IdentityFile C:UsersUser.sshid_rsaexample
Finally, use the shortcut Ctrl+Shift+P but search for Remote-SSH: Connect to Host… This will open a new VS Code window, ask you for the Host you created above, select MyRemoteServer for our example, and select Linux as your remote host OS.
If you are connecting for the first time, you need to select Continue to save the connection fingerprint locally and then enter the SSH passphrase you had typed when you created your public and private SSH keys (Go to the Authentication with SSH Keys in this tutorial to learn how to create and/or add SSH to your Digital Ocean cloud server).
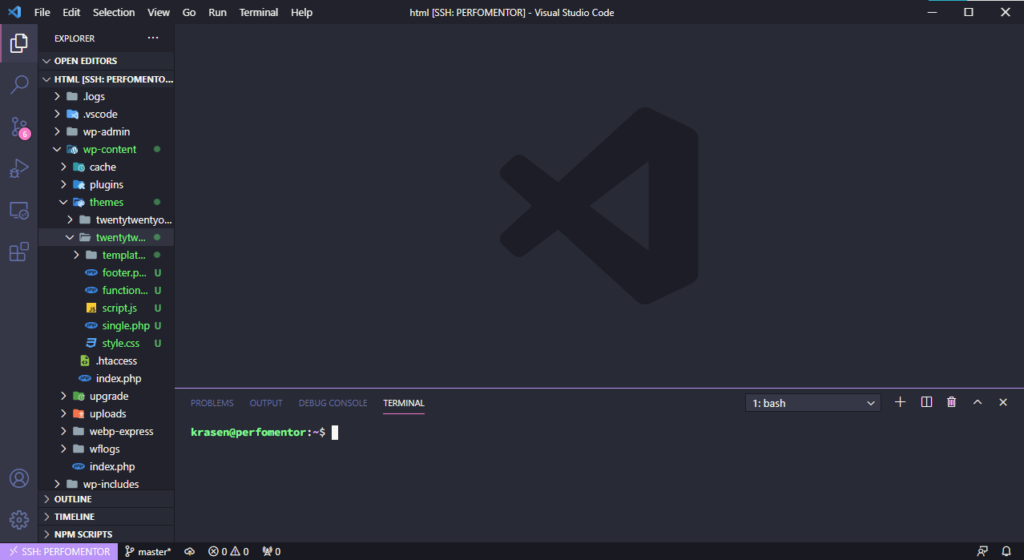
If everything went well and you are connected, you will see the following when you use the Ctrl+` shortcut to open your VS Code terminal. root@hostname:~#
Now, you know how to connect your Visual Studio Code to SSH.
You can now navigate to the Explorer tab in VS Code and click Open Folder. This will allow you to open a directory directly from your Digital Ocean cloud server.
At this point, you have everything you need to control within your Visual Studio Code application; you don’t need to have separate windows for Terminal, FTP, and/or Code Editor.
Install Git with GitHub CLI and Use Version Control for Your Development
In the section above, we set up an SSH connection and open our Web Server document root.
This section will install and configure Git with GitHub CLI and use version control for our development process. (Since everything is in Visual Studio Code, we can utilize its git control functions)
Install and Configure Git
You may already have Git installed, but if you don’t, you can run or check with the commands below. Also, add a name and an email as global variables. (If you use GitHub, add the same registration email)
$ sudo apt install git
$ sudo git --version
git version 2.25.1
$ git config --global user.name "Your Name"
$ git config --global user.email "name@domain.com"
Next, navigate to the directory where you need version control and run the following command.
$ cd /var/www/domain.com/html/wp-content/themes/twentytwentyone-child/
$ sudo git init
Initialized empty Git repository in...
You will see that all the files and folders will get highlighted green and have version control from now on.
GitHub CLI
In addition, we are going to install GitHub CLI so we can store our repository on their hosting platform (You can do that as a public or private repo, I assume that you already have a GitHub account created).
$ sudo apt-key adv --keyserver keyserver.ubuntu.com --recv-key C99B11DEB97541F0
$ sudo apt-add-repository https://cli.github.com/packages
$ sudo apt install gh
Below, I will show you how to authenticate, create a repository and push our first commit.
Before we do anything else, you need to generate a Personal Access Token for authentication. To do this, log in to your GitHub account go to Settings > Developer Settings > Personal Access Tokens. Generate New Token select the scope of your access (for our example, I selected the minimum required repo: all, admin.org > read: org).
Finally, save the token somewhere save (You can always generate a new one if you lose it or delete the file).
Now we are ready to authenticate, create and make our first push. For the sake of demonstration, let us use the example from the previous section where we initialized a version control directory.
$ cd /var/www/domain.com/html/wp-content/themes/twentytwentyone-child/
$ sudo gh auth login
? What account do you want to log into? GitHub.com
? What is your preferred protocol for Git operations? HTTPS
? Authenticate Git with your GitHub credentials? Yes
? How would you like to authenticate GitHub CLI? Paste an authentication token
Tip: you can generate a Personal Access Token here https://github.com/settings/tokens
The minimum required scopes are 'repo', 'read:org', 'workflow'.
? Paste your authentication token: ****************************************
- gh config set -h github.com git_protocol https
✓ Configured git protocol
✓ Logged in as username
$ sudo gh repo create wwentytwentyone-child --description "Twenty Twenty One Child" --private
? This will add remote origin to your current directory. Continue?  Yes
✓ Created repository username/twenty-twenty-one-child on GitHub
✓ Added remote https://github.com/username/twenty-twenty-one-child.git
$ sudo git add .
$ sudo git commit -m 'Initial commit'
$ sudo git push origin master
Now you can go ahead to your GitHub repositories and see a new private repository with the files we committed from your theme.
Again, as I showed you in the last two sections, you can do everything within Visual Code Studio by setting up your development environment.
7. Addons
In addition to everything above, you may wish to install and configure some additional software to maintain, secure, and improve your cloud server.
Below I will show you how to configure mail transfer agent, replace Apache with Nginx server, configure secure FTP server, authenticate with public & private SSH keys, configure PHPMyAdmin for easier MySQL maintenance, and setup RoundCube mailing client with which you can check your email via the browser without the need to login to your server.
Postfix with s-nail and Gmail Relay
You need to send, receive, read, or forward emails at some point. If you want plugins like Contact Form 7, you need to have a mail transfer agent configured and a basic mailing client to check your email messages.
First, we need to open port 25 and allow it in our Linux Firewall.
$ sudo ufw allow '25/tcp'
$ sudo ufw status
Status: active
To                         Action      From
--                         ------      ----
25/tcp                     ALLOW       Anywhere
25/tcp                     ALLOW       Anywhere (v6)
Configure Postfix
Next, let us configure Postfix and add a couple of virtual email addresses. You will automatically have an email associated with your user name, e.g., username > username@domain.com.
$ sudo dpkg-reconfigure postfix
Postfix configuration: OK
General type of mail configuration?: Internet Site
System mail name: domain.com
Root and postmaster mail recipient: username
Other destinations to accept mail for: domain.com, mail.domain.com, localhost.domain.com, localhost
Force synchronous updates on mail queue?: No
Local networks: 127.0.0.0/8 [::ffff:127.0.0.0]/104 [::1]/128
Mailbox size limit: 0
Local address extension character: +
Internet protocols to use: all
$ sudo cat /etc/postfix/main.cf
smtpd_relay_restrictions = permit_mynetworks permit_sasl_authenticated defer_unauth_destination
myhostname = domain.com
alias_maps = hash:/etc/aliases
alias_database = hash:/etc/aliases
myorigin = /etc/mailname
mydestination = domain.com, mail.domain.com, localhost.domain.com, localhost
relayhost =
mynetworks = 127.0.0.0/8 [::ffff:127.0.0.0]/104 [::1]/128
mailbox_size_limit = 0
recipient_delimiter = +
inet_interfaces = all
inet_protocols = all
home_mailbox = Maildir/
virtual_alias_maps = hash:/etc/postfix/virtual
$ sudo postconf -e 'home_mailbox= Maildir/'
$ sudo postconf -e 'virtual_alias_maps= hash:/etc/postfix/virtual'
$ sudo nano /etc/postfix/virtual
webmaster@domain.com username
hello@domain.com username
unique@domain.com username@gmail.com
$ sudo postmap /etc/postfix/virtual
$ sudo systemctl restart postfix
You can relay emails to email services like Gmail (Not the correct approach, but it should work; your emails will probably end up in the SPAM folder and maybe blocked sometimes by Google)
I noticed with forwarding that if you use username@domain.com to username@gmail.com, you get some issues. The forward domain user shouldn’t be an existing user within your system. Always check your logs first, e.g. sudo tail /var/log/mail.log If you have any issues.
Properly Configure Postfix to use Gmail as a Mail Relay
To properly relay emails to Gmail, you need to Allow Less Secure Apps or create App Password if you are using 2-Step Verification for your Gmail account login (The second method is recommended for better security. If haven’t converted to 2-Step Verification, you should do it)
Once you follow the Google steps by step guides above, you need to reconfigure Postfix as shown below. (Note, passwords below should be either your real password or the automatically generated one if you use the 2-Step Verification with App Password)
I am showing you an example where you send emails to different Gmail accounts, but sending to a single one can be done the same way. Just remove the sender_relay parts from the example.
$ sudo apt install mailutils
$ sudo nano /etc/postfix/sender_relay
user1@gmail.com [smtp.gmail.com]:587
user2@gmail.com [smtp.gmail.com]:587
$ sudo nano /etc/postfix/sasl_passwd
#Pre-sender Relay Authentication
user2@gmail.com          user2@gmail.com:password

#Default Relay Host
[smtp.gmail.com]:587    user1@gmail.com:password
$ sudo chmod 0600 /etc/postfix/sasl_passwd /etc/postfix/sasl_passwd.db
$ sudo nano /etc/postfix/main.cf
#Configure Postfix to use Gmail as a Mail Relay

relayhost = [smtp.gmail.com]:587
smtp_use_tls = yes
smtp_sasl_auth_enable = yes
smtp_sasl_security_options = noanonymous
smtp_tls_security_level = encrypt
smtp_sasl_mechanism_filter = plain
header_size_limit = 4096000
smtp_sasl_password_maps = hash:/etc/postfix/sasl_passwd

smtp_sender_dependent_authentication = yes
sender_dependent_relayhost_maps = hash:/etc/postfix/sender_relay
$ sudo postmap /etc/postfix/sender_relay
$ sudo postmap /etc/postfix/sasl_passwd
$ sudo systemctl restart postfix
$ echo 'Hello World!' | s-nail -s 'Hello World!' -Snorecord user1@domain.com
$ echo 'Hello World!' | s-nail -s 'Hello World!' -Snorecord user2@domain.com
Now Gmail won’t block your email messages, and you will receive them directly in your INBOX.
Hint, if you have multiple Gmail accounts and have several domains under the same Digital Ocean cloud served as virtual hosts, you can add all the authorizations in the /etc/postfix/sasl_passwd and /etc/postfix/sender_relay files as shown above. (Remember to reset the postmap and restart postfix after each change to the file)
Check Email Messages with s-nail
Next, we will configure the s-nail mailing client we previously installed. Other mail client options considered could be SquirrelMail or RoundCube (these usually require more extensive configuration, and I show you how to set up RoundCube in the Addons section below)
$ echo 'export MAIL=~/Maildir' | sudo tee -a /etc/bash.bashrc | sudo tee -a /etc/profile.d/mail.sh
$ source /etc/profile.d/mail.sh
$ sudo nano /etc/s-nail.rc
#Add the following configuration lines at end of the file

set emptystart
set folder=Maildir
set record=+sent
$ echo 'Hello World!' | s-nail -s 'Hello World!' -Snorecord username
$ echo 'Hello World!' | s-nail -s 'Hello World!' -Snorecord unique@domain.com
$ ls -R ~/Maildir
/home/username/Maildir:
cur  new  tmp
/home/username/Maildir/cur:
/home/username/Maildir/new:
1613008884.Vfc01I81112M312975.domain
/home/username/Maildir/tmp:
$ s-nail
/home/username/Maildir: 1 message 1 new
▸N  1 First Last      2021-02-13 02:01   14/411   init
? q
In s-nail, enter a number to preview a message, d to delete, h to list all, and q to quit.
If you have any issues, head up and preview the mail log file sudo tail /var/log/mail.log and see if there is any clue why things don’t work as they should.
Testing the Postfix with s-nail
If you remember, in the section above, we set webmaster@domain.com as our primary WordPress email. Let us change it to hello@domain.com.
To do this, login into your WP Admin, go to Settings > General, switch the emails, and Update. Now, if you type s-nail in your console, you will see the following output:
$ s-nail
/home/username/Maildir: 2 messages 1 new
 O  1 First Last         2021-02-11 02:01   14/411   init
▸N  2 WordPress          2021-02-11 02:03   31/1015  New Admin Email Address
? q
Open the email, copy-paste the confirm email URL into your browser, and voila, your WP Admin email address is switched and confirmed.
Moreover, you can now install the Contact Form 7 plugin and test if you receive contact messages locally or get forwarded to your Gmail account successfully.
Authentication with SSH Keys
Running your Web Server gives you a lot of freedom, but at the same time, you need to be very careful when it comes to security.
When we set up our cloud server at the beginning of this tutorial, we used the root password authentication method and even disabled root access to improve the security. There is a better and more secure way to do that.
Below I will show you how to generate public and private SSH keys and use them to log in to your cloud server.
You have the option to download PuTTYgen for Windows or use its ported versions on Mac or Linux, but for this example, we are going to use OpenSSH, which is a universal way to generate public and private SSH keys.
Firstly, You need to check if you have it installed on your operating system. Just open the terminal or command prompt in your OS and type ssh -V. You will see similar output if you have it installed.
#Window
OpenSHH_for_Windows_7.7p1, LibreSSL 2.6.5
#Linux
OpenSSH_8.2p1 Ubuntu-4ubuntu0.1, OpenSSL 1.1.1f 31 Mar 2020
#MacOS
OpenSSH_8.1p1, LibreSSL 2.7.3
Next, we are going to generate the keys on your local machine. The example below is done on Windows, but it should be similar to macOS or Linux.
C:UsersUser> ssh-keygen
Generating public/private rsa key pair.
Enter file in which to save the key (C:UsersUsername/.ssh/id_rsa):
Enter passphrase (empty for no passphrase):
Enter same passphrase again:
Your identification has been saved in example.
Your public key has been saved in example.pub.
The key fingerprint is:
C:UsersUser> cd C:UsersUser/.ssh/id_rsa
C:UsersUser/.ssh/id_rsa> dir
02/15/2021  11:20 AM    1,766 example
02/15/2021  11:20 AM      405 example.pub
If you don’t have the id_rsa directory created, you may need to create it manually.
When you create a new Droplet, you need to select SSH keys as your Authentication method. Then click on the New SSH Key button, copy/paste the example.pub content in the text area and click on Add SHH Key button.
You can proceed with your setup as normal, but when you go and login with PuTTY, this time you should go to SSH > Auth tab and under Private key file for authentication: browser and select the other file in the id_rsa directory, in the sample above named, without the .pub extension. Then follow the same steps from the Login to your Cloud Server section at the beginning of the tutorial.
Lastly, once prompted, you should log in with root as username and enter the specified SSH key passphrase you have selected earlier.
If you have a cloud server already created with a password and want to switch to the SSH keys authentication method, just do the following procedure.
$ sudo nano /root/.ssh/authorized_keys
[add the example.pub file content]
$ sudo nano /etc/ssh/sshd_config
PermitRootLogin without-password
$ sudo systemctl restart sshd
Replace Apache with Nginx
At some point, you may wish to switch from Apache to the Nginx server. Here is a very well-written article about the pros and cons of Apache vs. Nginx.
There are several steps we need to take to accomplish the switch. We will not delete Apache because, at some point, you might decide to revert.
Firstly, let us install Nginx with all the additional packages and reconfigure our Linux firewall.
$ sudo apt install nginx python3-certbot-nginx php-fpm
$ sudo ufw app list
Available applications:
  Apache
  Apache Full
  Apache Secure
  Nginx Full
  Nginx HTTP
  Nginx HTTPS
  OpenSSH
  Postfix
  Postfix SMTPS
  Postfix Submission
$ sudo ufw status
Status: active
To                         Action      From
--                         ------      ----
Apache Full                ALLOW       Anywhere
Apache Full (v6)           ALLOW       Anywhere (v6)
$ sudo ufw delete allow 'Apache Full'
$ sudo ufw allow 'Nginx Full'
$ sudo ufw status
Status: active
To                         Action      From
--                         ------      ----
Nginx Full                 ALLOW       Anywhere
Nginx Full (v6)            ALLOW       Anywhere (v6)
$ sudo systemctl stop apache2
$ sudo systemctl disable apache2
$ sudo systemctl enable nginx
$ sudo systemctl start nginx
$ sudo systemctl status | grep apache2
[no results found]
$ sudo systemctl status | grep nginx
  nginx.service
  │ ├─54972 /usr/sbin/nginx -k start
At this point, if you open http://domain.com, you will get the default Nginx index page.
Configure Nginx and Enable SSL Support
The next step is to configure our Nginx server similar to Apache and enable SSL support.
$ sudo nano /etc/nginx/sites-available/domain.com
server {
  listen 80;
  listen [::]:80;
  root /var/www/domain.com/html;
  index index.php index.html index.htm index.nginx-debian.html;
  server_name domain.com www.domain.com;
  location / {
    try_files $uri $uri/ /index.php?$args;
  }
  location ~ .php$ {
    include snippets/fastcgi-php.conf;
    fastcgi_pass unix:/run/php/php7.4-fpm.sock;
  }
  location ~ /.ht {
    deny all;
  }
}
$ sudo ln -s /etc/nginx/sites-available/domian.com /etc/nginx/sites-enabled/
$ sudo unlink /etc/nginx/sites-enabled/default
$ sudo nano /etc/nginx/nginx.conf
#Uncomment the line below.

server_names_hash_bucket_size 64;
$ sudo nginx -t
nginx: the configuration file /etc/nginx/nginx.conf syntax is ok
nginx: configuration file /etc/nginx/nginx.conf test is successful
When writing this tutorial, I am using PHP 7.4, but if you are using a newer version, update the following line: fastcgi_pass unix:/run/php/php7.4-fpm.sock; with your version.
Now, let us reconfigure and regenerate our SSL certificate. It is the same process as Apache, but this time for Nginx.
$ sudo certbot --nginx -d domain.com -d www.domain.com
What would you like to do?
1: Attempt to reinstall this existing certificate
2: Renew & replace the cert (limit ~5 per 7 days)
Select the appropriate number [1-2] then [enter] (press 'c' to cancel): 1
- - - - - - - - - - - - - - - - - - - - - - - - - - - - - - - - - - - - - - - -
Please choose whether or not to redirect HTTP traffic to HTTPS, removing HTTP access.
1: No redirect - Make no further changes to the webserver configuration.
2: Redirect - Make all requests redirect to secure HTTPS access. Choose this for new sites, or if you're confident your site works on HTTPS. You can undo this change by editing your web server's configuration.
Select the appropriate number [1-2] then [enter] (press 'c' to cancel): 2
$ sudo certbot renew --dry-run
$ sudo cat /etc/nginx/sites-enabled/domain.com
server {
  listen 80;
  listen [::]:80;
  root /var/www/domain.com/html;
  index index.php index.html index.htm index.nginx-debian.html;
  server_name domain.com www.domain.com;
  location / {
    try_files $uri $uri/ /index.php?$args;
  }
  location ~ .php$ {
    include snippets/fastcgi-php.conf;
    fastcgi_pass unix:/run/php/php7.4-fpm.sock;
  }
  location ~ /.ht {
    deny all;
  }
  listen [::]:443 ssl ipv6only=on; # managed by Certbot
  listen 443 ssl; # managed by Certbot
  ssl_certificate /etc/letsencrypt/live/domain.com/fullchain.pem; # managed by Certbot
  ssl_certificate_key /etc/letsencrypt/live/domain.com/privkey.pem; # managed by Certbot
  include /etc/letsencrypt/options-ssl-nginx.conf; # managed by Certbot
  ssl_dhparam /etc/letsencrypt/ssl-dhparams.pem; # managed by Certbot
}
Be sure to check the configuration file. It should look like the output above after the configuration of the SSL.
Testing the Nginx
Finally, let us test and see if we run an Nginx server. You can check this using the DevTools of your browser as well.
$ sudo curl -sSL -D - domain.com -o /dev/null
HTTP/1.1 200 OK
Server: nginx/1.18.0 (Ubuntu)
Date: Thu, 11 Feb 2021 03:28:17 GMT
Content-Type: text/html; charset=UTF-8
Transfer-Encoding: chunked
Connection: keep-alive
Link: <https://domain.co/wp-json/>; rel="https://api.w.org/"
Secure FTP with vsftpd
Having a way to securely access your server via FTP is a must if you want to do WordPress web development and store and upload files to your cloud server. First, let us install vsftpd create the file structure, and allow the ports we need in our Linux firewall.
$ sudo apt install vsftpd
$ sudo ufw allow 20/tcp
$ sudo ufw allow 21/tcp
$ sudo ufw allow 990/tcp
$ sudo ufw allow 40000:50000/tcp
$ sudo ufw status
Status: active
To                         Action      From
--                         ------      ----
20/tcp                     ALLOW       Anywhere
21/tcp                     ALLOW       Anywhere
990/tcp                    ALLOW       Anywhere
40000:50000/tcp            ALLOW       Anywhere
20/tcp (v6)                ALLOW       Anywhere (v6)
21/tcp (v6)                ALLOW       Anywhere (v6)
990/tcp (v6)               ALLOW       Anywhere (v6)
40000:50000/tcp (v6)       ALLOW       Anywhere (v6)
$ sudo mkdir /home/username/ftp
$ sudo chown nobody:nogroup /home/username/ftp
$ sudo chmod a-w /home/username/ftp
$ sudo ls -la /home/username/ftp
total 8
dr-xr-xr-x 2 nobody nogroup 4096 Feb 11 13:16 .
drwxr-xr-x 7 username username  4096 Feb 11 13:16 ..
$ sudo mkdir /home/username/ftp/files
$ sudo chown $USER:$USER /home/username/ftp/files
$ sudo ls -la /home/username/ftp
$ echo "vsftpd test file" | sudo tee /home/username/ftp/files/test.txt
$ sudo nano /etc/vsftpd.conf
#Add the following configuration lines at end of the file

anonymous_enable=NO
local_enable=YES
write_enable=YES
chroot_local_user=YES
user_sub_token=$USER
local_root=/home/$USER/ftp
pasv_min_port=40000
pasv_max_port=50000
userlist_enable=YES
userlist_file=/etc/vsftpd.userlist
userlist_deny=NO
$ sudo nano /etc/ssh/sshd_config
# Change the line below if you haven't done it earlier

PasswordAuthentication yes
$ echo "username" | sudo tee -a /etc/vsftpd.userlist
$ sudo cat /etc/vsftpd.userlist
username
$ sudo systemctl restart sshd
$ sudo systemctl restart vsftpd
Testing the FTP Server
Now we are ready to test our FTP server. You can see that anonymous login is denied, and you can either log in with your IP Address or domain name.
$ sudo ftp -p 111.111.111.111
$ sudo ftp -p domain.com
Connected to domain.com.
220 (vsFTPd 3.0.3)
Name (domain.com:root): username
331 Please specify the password.
Password:
230 Login successful.
Remote system type is UNIX.
Using binary mode to transfer files.
ftp> quit
$ sudo ftp -p username@domain.com
Connected to domain.com.
220 (vsFTPd 3.0.3)
Name (domain.com:root): anonymous
530 Permission denied.
Login failed.
ftp> quit
Securing the FTP Server
In addition, it would be wise to secure our FTP server and add SSL support.
$ sudo openssl req -x509 -nodes -days 365 -newkey rsa:2048 -keyout /etc/ssl/private/vsftpd.pem -out /etc/ssl/private/vsftpd.pem
-----
Country Name (2 letter code) [AU]:
State or Province Name (full name) [Some-State]:
Locality Name (eg, city) []:
Organization Name (eg, company) [Internet Widgits Pty Ltd]:
Organizational Unit Name (eg, section) []:
Common Name (e.g. server FQDN or YOUR name) []:
Email Address []:
$ sudo nano /etc/vsftpd.conf
#Add the following configuration lines at end of the file
#After what we added in the section above

rsa_cert_file=/etc/ssl/private/vsftpd.pem
rsa_private_key_file=/etc/ssl/private/vsftpd.pem
ssl_enable=YES
allow_anon_ssl=NO
force_local_data_ssl=YES
force_local_logins_ssl=YES
ssl_tlsv1=YES
ssl_sslv2=NO
ssl_sslv3=NO
require_ssl_reuse=NO
ssl_ciphers=HIGH
$ sudo systemctl restart vsftpd
$ sudo ftp -p domain.com
Connected to domain.com.
220 (vsFTPd 3.0.3)
Name (domain.com:root): username
530 Non-anonymous sessions must use encryption.
Login failed.
421 Service not available, remote server has closed connection
ftp> quit
$ sudo sftp -p username@domain.com
The authenticity of host 'domain.com (111.111.111.111)' can't be established.
ECDSA key fingerprint is SHA256:tk6x32...
Are you sure you want to continue connecting (yes/no/[fingerprint])? yes
Warning: Permanently added 'domain.com,111.111.111.111' (ECDSA) to the list of known hosts.
username@domain.com's password:
Connected to domain.com.
sftp> quit
In the above example, after setting up SSL, you can see that a normal FTP connection isn’t available anymore, and we need to use sFTP.
You can now go ahead and test the same with your favorite FTP client (e.g., FileZilla, WinSCP, or CyberDuck) or install a Visual Studio Code sFTP extension and do the same.
Add FTP-only Users
I mentioned this earlier, but to read, write, and delete files and directories from your Web Server, you need to have the correct permissions and ownership. Go back to the WordPress section of this tutorial to see how I configured it.
Below we will create an FTP-only user, remove his SSH access and lock it in the /var/www/domain.com/html directory.
$ sudo adduser ftponly
New password:
Retype new password:
passwd: password updated successfully
Changing the user information for username
Enter the new value, or press ENTER for the default
  Full Name []:
  Room Number []:
  Work Phone []:
  Home Phone []:
  Other []:
Is the information correct? [Y/n] Y
$ sudo usermod -aG www-data ftponly
$ sudo usermod --home /var/www/domain.com/html ftponly
$ sudo usermod -s /sbin/nologin ftponly
$ sudo nano /etc/ssh/sshd_config
#Add the following configuration lines at end of the file
#And comment the old line below

#Subsystem      sftp    /usr/lib/openssh/sftp-server
Subsystem       sftp    internal-sftp
Match group ftponly
  ChrootDirectory /var/www/domain.com
  X11Forwarding no
  AllowTcpForwarding no
  ForceCommand internal-sftp
$ sudo systemctl restart sshd
$ sudo cat /etc/group | grep ftponly
ftponly:x:1001:
$ sudo cat /etc/passwd | grep ftponly
ftponly:x:1001:1001:Ftponly,,,:/var/www/domain.com/html:/sbin/nologin
$ sudo id ftponly
uid=1001(ftponly) gid=1001(ftponly) groups=1001(ftponly),33(www-data),121(ftp)
$ su ftponly
Password:
su: Authentication failure
$ sudo sftp -p ftponly@domain.com
Are you sure you want to continue connecting (yes/no/[fingerprint])? yes
ftponly@domain.com password:
Connected to domain.com.
sftp> ls
drwxr-xr-x    3 root     root         4096 Feb 13 08:19 .
drwxr-xr-x    3 root     root         4096 Feb 13 08:19 ..
drwxr-xr-x    6 33       33           4096 Feb 14 08:57 html
sftp> cd /
sftp> ls
drwxr-xr-x    3 root     root         4096 Feb 13 08:19 .
drwxr-xr-x    3 root     root         4096 Feb 13 08:19 ..
drwxr-xr-x    6 33       33           4096 Feb 14 08:57 html
In the end, I run a couple of commands to show you how to preview your user mods.
Note that the –home directory must always be one level deeper than the ChrootDirectory.
Also, the Match group ftponly rule in the sshd_config would apply only for the new ftponly user we created. If you wish to have multiple users, you should add them to the ftp group with usermod and change the match line to Match group ftp.
PHPMyAdmin for Easier MySQL Administration
PHPMyAdmin application is an easier and faster way to interact with your MySQL server via a web interface. In the steps below, we will configure it and make it secure.
Install PHPMyAdmin
$ sudo apt install phpmyadmin php-mbstring php-zip php-gd php-json php-curl
$ sudo phpenmod mbstring
$ sudo systemctl restart apache2- When you get the server selection question, choose apache2, then select OK
- Configure database for phpmyadmin with dbconfig-common? Yes
- Enter the PHPMyAdmin database password twice.
If you get a message that the password doesn’t satisfy the specified rules (If you had selected 1 or 2 when we secured MySQL), select ignore.
Then uninstall the MySQL component responsible for password validation, rerun PHPMyAdmin installation, and reinstall the MySQL password component to bring back the security level to normal.
$ sudo mysql -u root -p
Enter password:
mysql> UNINSTALL COMPONENT "file://component_validate_password";
mysql> QUIT;
$ sudo dpkg-reconfigure phpmyadmin
$ sudo mysql -u root -p
Enter password:
mysql> INSTALL COMPONENT "file://component_validate_password";
mysql> QUIT;
Remember when we installed our MySQL Server above, we selected medium-level passwords. Your password must adhere to these rules.
If you log in to MySQL with your root, you will see the newly created table for PHPMyAamin.
$ sudo mysql -u root -p
Enter password:
mysql> SHOW DATABASES;
+--------------------+
| Database           |
+--------------------+
| information_schema |
| database           |
| mysql              |
| performance_schema |
| phpmyadmin         |
| sys                |
+--------------------+
6 rows in set (0.00 sec)
Now you can go ahead and open https://domain.com/phpmyadmin and login to your PHPMyAdmin with the MySQL username and password you have specified earlier (not root). You can access the PHPMyAdmin URL with any virtual host domain name.
Secure PHPMyAdmin
In addition, you can use the following steps to make PHPMyAdmin access even more secure.
$ sudo nano /etc/apache2/conf-available/phpmyadmin.conf
<Directory /usr/share/phpmyadmin>;
  Options SymLinksIfOwnerMatch
  DirectoryIndex index.php
  AllowOverride All ### Add this line after the lines above
$ sudo nano /usr/share/phpmyadmin/.htaccess
AuthType Basic
AuthName "Restricted Files"
AuthUserFile /etc/phpmyadmin/.htpasswd
Require valid-user
$ sudo htpasswd -c /etc/phpmyadmin/.htpasswd username
New password:
Re-type new password:
Adding password for user username
$ sudo systemctl restart apache2
If you go back and refresh the PHPMyAdmin URL, you will be prompted to enter another username and password to access the actual URL address. This adds another layer of security to your MySQL Server access.
Dovecot IMAP-server with RoundCube
RoundCube is an excellent option for a customizable IMAP-based webmail client, and it has a large set of features for viewing, organizing, and composing emails. Alternative options you may consider are SquirrelMail or MailHog.
Before installing and configuring RoundCube, we need to have an IMAP-based server. We can always use the Gmail IMAP-server, but we will install our own with Dovecot for this tutorial. If you wish to go the Gmail route, look at this tutorial from Digital Ocean.
First, let us install and configure the Dovecot IMAP server. For this, you should already have a running and configured Web Server (the example below is with Apache, but it can easily be used with Nginx with a couple of modifications) and Postfix.
Enable Submission Service and Reconfigure Postfix
$ sudo nano /etc/postfix/master.cf
#Add the following configuration lines at end of the file

submission     inet     n    -    y    -    -    smtpd
  -o syslog_name=postfix/submission
  -o smtpd_tls_security_level=encrypt
  -o smtpd_tls_wrappermode=no
  -o smtpd_sasl_auth_enable=yes
  -o smtpd_relay_restrictions=permit_sasl_authenticated,reject
  -o smtpd_recipient_restrictions=permit_mynetworks,permit_sasl_authenticated,reject
  -o smtpd_sasl_type=dovecot
  -o smtpd_sasl_path=private/auth
smtps     inet  n       -       y       -       -       smtpd
  -o syslog_name=postfix/smtps
  -o smtpd_tls_wrappermode=yes
  -o smtpd_sasl_auth_enable=yes
  -o smtpd_relay_restrictions=permit_sasl_authenticated,reject
  -o smtpd_recipient_restrictions=permit_mynetworks,permit_sasl_authenticated,reject
  -o smtpd_sasl_type=dovecot
  -o smtpd_sasl_path=private/auth
$ sudo nano /etc/postfix/main.cf
#Add the following configuration lines at end of the file
#Comment the old TLS parameter rules

#TLS parameters
#smtpd_tls_cert_file=/etc/ssl/certs/ssl-cert-snakeoil.pem
#smtpd_tls_key_file=/etc/ssl/private/ssl-cert-snakeoil.key
#smtpd_tls_security_level=may

smtpd_tls_cert_file=/etc/letsencrypt/live/mail.domain.com/fullchain.pem
smtpd_tls_key_file=/etc/letsencrypt/live/mail.domain.com/privkey.pem
smtpd_tls_security_level=may
smtpd_tls_loglevel = 1
smtpd_tls_session_cache_database = btree:${data_directory}/smtpd_scache
smtp_tls_security_level = may
smtp_tls_loglevel = 1
smtp_tls_session_cache_database = btree:${data_directory}/smtp_scache
smtpd_tls_mandatory_protocols = !SSLv2, !SSLv3, !TLSv1, !TLSv1.1
smtpd_tls_protocols = !SSLv2, !SSLv3, !TLSv1, !TLSv1.1
smtp_tls_mandatory_protocols = !SSLv2, !SSLv3, !TLSv1, !TLSv1.1
smtp_tls_protocols = !SSLv2, !SSLv3, !TLSv1, !TLSv1.1
mailbox_transport = lmtp:unix:private/dovecot-lmtp
smtputf8_enable = no
$ sudo systemctl restart postfix
$ sudo ss -lnpt | grep master
Create a Subdomain for our Mail Server
You need to navigate your Digital Ocean web interface domain area and add an A record with hostname mail.
A mail.domain.com directs to 111.111.111.111 3600Additionally, we should open some ports into our Linux Firewall, set up the mail.domain.com, create the directory structure with the correct permissions ownership, and add SSL support for our subdomain.
Reconfigure the Linux Firewall
$ sudo ufw allow 80
$ sudo ufw allow 443
$ sudo ufw allow 587
$ sudo ufw allow 465
$ sudo ufw allow 143
$ sudo ufw allow 993/tcp
$ sudo ufw allow 110
$ sudo ufw allow 995/tcp
$ sudo ufw status
Status: active
To                         Action      From
--                         ------      ----
80                         ALLOW       Anywhere
443                        ALLOW       Anywhere
587                        ALLOW       Anywhere
465                        ALLOW       Anywhere
143                        ALLOW       Anywhere
993/tcp                    ALLOW       Anywhere
110                        ALLOW       Anywhere
995/tcp                    ALLOW       Anywhere
80 (v6)                    ALLOW       Anywhere (v6)
443 (v6)                   ALLOW       Anywhere (v6)
587 (v6)                   ALLOW       Anywhere (v6)
465 (v6)                   ALLOW       Anywhere (v6)
143 (v6)                   ALLOW       Anywhere (v6)
993/tcp (v6)               ALLOW       Anywhere (v6)
110                        ALLOW       Anywhere (v6)
995/tcp                    ALLOW       Anywhere (v6)
$ sudo nano /etc/apache2/sites-available/mail.domain.com.conf
<VirtualHost *:80>
  ServerName mail.domain.com
  DocumentRoot /var/www/mail.domain.com/html
</VirtualHost>
$ sudo mkdir -p /var/www/mail.domain.com/html
$ sudo chown -R www-data:www-data /var/www/mail.domain.com/html
$ sudo a2ensite mail.domain.com.conf
$ sudo systemctl restart apache2
$ sudo certbot --apache -d mail.domain.com
What would you like to do?
- - - - - - - - - - - - - - - - - - - - - - - - - - - - - - - - - - - - - - - -
1: Attempt to reinstall this existing certificate
2: Renew & replace the cert (limit ~5 per 7 days)
- - - - - - - - - - - - - - - - - - - - - - - - - - - - - - - - - - - - - - - -
Select the appropriate number [1-2] then [enter] (press 'c' to cancel): 1
- - - - - - - - - - - - - - - - - - - - - - - - - - - - - - - - - - - - - - - -
Please choose whether or not to redirect HTTP traffic to HTTPS, removing HTTP access.
- - - - - - - - - - - - - - - - - - - - - - - - - - - - - - - - - - - - - - - -
1: No redirect - Make no further changes to the webserver configuration.
2: Redirect - Make all requests redirect to secure HTTPS access. Choose this for
new sites, or if you're confident your site works on HTTPS. You can undo this
change by editing your web server's configuration.
- - - - - - - - - - - - - - - - - - - - - - - - - - - - - - - - - - - - - - - -
Select the appropriate number [1-2] then [enter] (press 'c' to cancel): 2
Install and Configure Dovecot
Now we are ready to install and configure Dovecot.
$ sudo apt install dovecot-core dovecot-imapd dovecot-lmtpd dovecot-pop3d
$ sudo nano /etc/dovecot/dovecot.conf
#Add this line before the next one

protocols = imap lmtp pop3
!include_try /usr/share/dovecot/protocols.d/*.protocol
$ sudo postconf mail_spool_directory
mail_spool_directory = /var/mail
$ sudo nano /etc/dovecot/conf.d/10-mail.conf
#Comment the first line and the next two after it

#mail_location = mbox:~/mail:INBOX=/var/mail/%u
mail_location = maildir:~/Maildir
mail_privileged_group = mail
$ sudo nano /etc/dovecot/conf.d/10-auth.conf
#Add the following configuration lines at end of the file

disable_plaintext_auth = yes
auth_username_format = %n
auth_mechanisms = plain
auth_mechanisms = plain login
$ sudo nano /etc/dovecot/conf.d/10-ssl.conf
#Add the following configuration lines at end of the file

ssl = required
ssl_cert = </etc/letsencrypt/live/mail.domain.com/fullchain.pem
ssl_key = </etc/letsencrypt/live/mail.domain.com/privkey.pem
ssl_prefer_server_ciphers = yes
#ssl_protocols = !SSLv3 !TLSv1 !TLSv1.1 #Dovecot version 2.2.x
ssl_min_protocol = TLSv1.2 #Dovecot version 2.3.x
$ sudo nano /etc/dovecot/conf.d/10-master.conf
service lmtp {
  #Add the following configuration lines at the end inside this block

  unix_listener /var/spool/postfix/private/dovecot-lmtp {
    mode = 0600
    user = postfix
    group = postfix
  }
}
service auth {
  #Add the following configuration lines at the end inside this block

  unix_listener /var/spool/postfix/private/auth {
    mode = 0660
    user = postfix
    group = postfix
  }
}
$ sudo nano /etc/dovecot/conf.d/15-mailboxes.conf
namespace inbox {
  #Add the following configuration at the end ofinside this block

  mailbox Trash {
    auto = create
    special_use = Trash
  }
}
$ sudo adduser dovecot mail
$ sudo systemctl restart postfix dovecot apache2
Install and Configure RoundCube
Finally, we are ready to install and configure our RoundCube Webmail client. You can download the latest stable complete version from their website. Be sure to have the correct URL for our wget command.
$ sudo apt-get install php-imagick php-xml php-mbstring php-intl php-zip php-pear zip unzip git composer
$ sudo systemctl restart apache2
$ sudo nano /etc/php/7.4/apache2/php.ini
;Add the following configuration lines at end of the file

date.timezone = "America/New_York"
upload_max_filesize = 12M
post_max_size = 18M
mbstring.func_overload = 0
$ wget https://github.com/roundcube/roundcubemail/releases/download/1.4.11/roundcubemail-1.4.11-complete.tar.gz
$ tar xvzf roundcubemail-1.4.11-complete.tar.gz
$ sudo mv roundcubemail-1.4.11/* /var/www/mail.domain.com/html
$ sudo chown -R www-data:www-data /var/www/mail.domain.com/html
$ sudo chmod 775 /var/www/mail.domain.com/html/temp/ /var/www/mail.domain.com/html/logs/
$ sudo mysql -u root -p
Enter password:
mysql> CREATE DATABASE roundcubemail;
mysql> CREATE USER 'roundcube'@'localhost' IDENTIFIED BY 'password';
mysql> GRANT ALL PRIVILEGES ON roundcubemail.* to 'roundcube'@'localhost';
mysql> FLUSH PRIVILEGES;
mysql> QUIT;
$ sudo mysql -u roundcube -p roundcubemail < /var/www/mail.domain.com/html/SQL/mysql.initial.sql
$ sudo mysql -u roundcube -p
Enter password:
mysql> USE roundcubemail;
mysql> SHOW tables;
+-------------------------+
| Tables_in_roundcubemail |
+-------------------------+
| cache                   |
| cache_index             |
| cache_messages          |
| cache_shared            |
| cache_thread            |
| contactgroupmembers     |
| contactgroups           |
| contacts                |
| dictionary              |
| filestore               |
| identities              |
| searches                |
| session                 |
| system                  |
| users                   |
+-------------------------+
15 rows in set (0.01 sec)
Now, you are ready to go and install RoundCube via the web interface. Open https://mail.domain.com/installer/ in your favorite browser.
- Check Environment – should have OK for all except LDAP and All databases but MySQL.
- Create Config
- Enter product_name, support_url like e.g webmaster@domain.com & username_domain like domain.com
- Enter your database_password, verify if the user and database name are correct
- IMAP Settings default_host to ssl://mail.domain.com and default_port to 993
- SMTP Settings smtp_server to ssl://mail.domain.com and smtp_port to 465
- Check the following plugins to install: archive, emoticons, enigma, filesystem_attachments, hide_blockquote, identity_select, markasjunk, newmail_notifier
- Click on the Update and then Continue buttons
- Test Config – should have everything OK
- Test SMTP config – enter username@domain.com and password for authentication and then Sender and Recipient email addresses. You should get SMTP send: OK
- Test IMAP config – enter username@domain.com and password and click on the Check Login button. You should get IMAP connect: OK (SORT capability: yes)
After all the testing is successful, you can open https://mail.domain.com/ and log in with your user and send and receive emails. Note that you will probably receive your message in your Gmail SPAM folder. I discussed this earlier in the Postfix section and further fixed it using POP. We already have POP available in our configuration.
You may also like to remove the RoundCube installer directory by running the command below.
$ sudo rm -rf /var/www/mail.domain.com/html/installerAdd and View Mail Users
Adding and listing Dovecot users can be done as easily as a normal Linux user. Your new user is added to the Dovecot group.
After his first login to RoundCube, the email newuser@domain.com will be created automatically.
You should see newuser below after his first login
$ sudo adduser newuser
$ sudo systemctl restart dovecot
$ sudo doveadm user '*'
nobody
systemd-coredump
lxd
do-agent
username
newuser
nobody
Mail Troubleshooting
If you get any hick-ups, here are a couple of methods to troubleshoot your Dovecot and mailing configurations.
$ sudo tail -f /var/log/mail.log
$ sudo journalctl -eu dovecot
systemd[1]: dovecot.service: Succeeded.
systemd[1]: Stopped Dovecot IMAP/POP3 email server.
systemd[1]: Started Dovecot IMAP/POP3 email server.
dovecot[100250]: master: Dovecot v2.3.7.2 (3c910f64b) starting up for imap, lmtp...
$ sudo systemctl status dovecot
● dovecot.service - Dovecot IMAP/POP3 email server
   Loaded: loaded (/lib/systemd/system/dovecot.service; enabled; vendor preset: enabled)
   Active: active (running) since Mon 2021-02-15 07:10:23 UTC; 41s ago
$ sudo postconf mydestination
mydestination = domain.com, mail.domain.com, localhost.domain.com, localhost
Postfix and Dovecot Automation
Finally, it is nice to add some automation to our setup. The following commands will add a cron job to auto-renew our TSL certificate and automatically restart Dovecot if its process is stopped or killed by mistake.
$ sudo crontab -e
@daily certbot renew --quiet && systemctl reload postfix dovecot apache2
$ sudo systemctl restart dovecot
$ sudo mkdir -p /etc/systemd/system/dovecot.service.d/
$ sudo nano /etc/systemd/system/dovecot.service.d/restart.conf
[Service]
Restart=always
RestartSec=5s
$ sudo systemctl daemon-reload
$ sudo pkill dovecot
$ sudo systemctl status dovecot
8. Conclusion
Hopefully, this tutorial (or parts of it) was useful, and you have completed the steps without any hick-ups. Please share your experience and ask your questions in the comment section below.